Do you want the data entered to your excel sheets to be within a specified range? Do you have multiple cells to be data validated all at once? Well, we have the perfect solution for you. All you need to do is making use of the Data Validation feature available in Excel. Read on, to learn how to hack this simple trick.
STEP 1
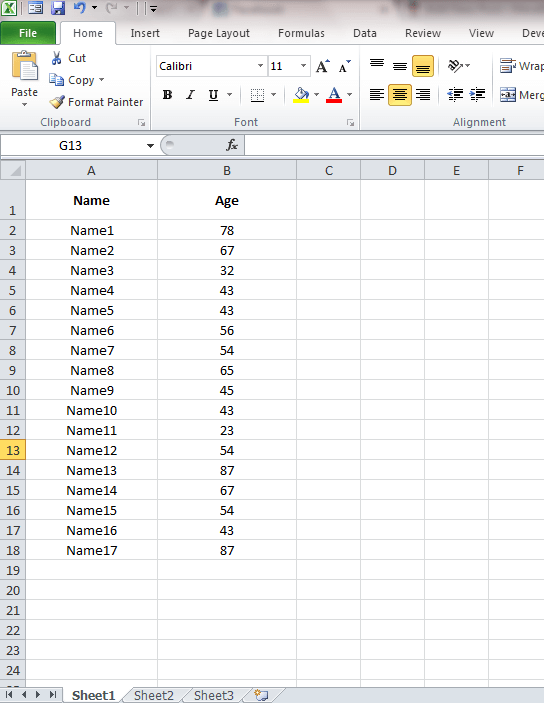
- Open the excel sheet that you want to data validate.
STEP 2
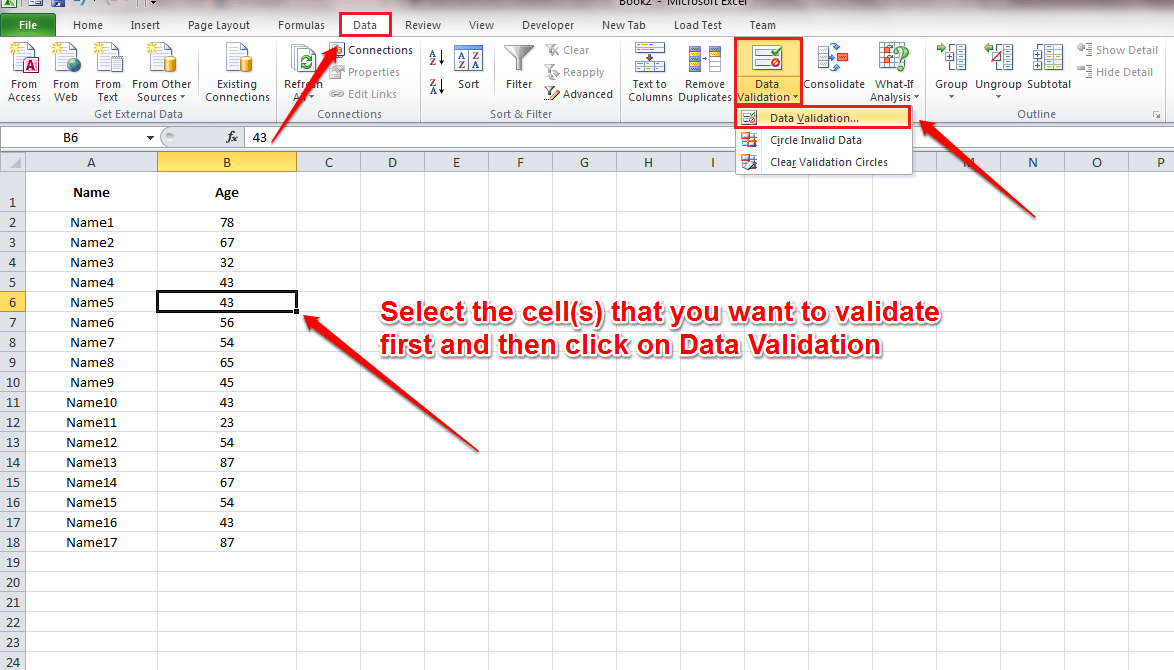
- Let’s say you want to validate the value of the cell B6 of age column. You want the value in B6 to be in between 20 and 90 as that is your preferred age value. For that, select the cell B6. You can select multiple cells to apply the same validation. Once you have selected the cell(s), click on the Data tab. As next, click on Data Validation button and then on Data Validation option. Take the following screenshot for reference.
STEP 3
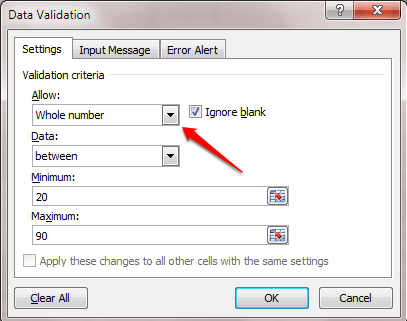
- A new window named Data Validation opens up. Under the Settings tab, you can set the Validation criteria. I have set my criteria of age coming in between 20 and 90 as shown in the screenshot given below.
STEP 4
- Now under the Input Message tab, you can write down the message that is to be shown to the user when he/she tries to enter values to the validated cell(s).
STEP 5
- Under the Error Alert tab, you can choose a Style. This is the icon that will be shown with your alert message. I have chosen Warning style. You can also set a title and a customized message for your error alert. Once you are all done, hit OK button.
STEP 6
- Now if you try to enter a value to the validated cell, it will show you the input message.
STEP 7
- If you enter a value out of the specified range, an error alert will be thrown at you.
Try validating your excel sheets today itself. Hope you found the article useful. Do come back for more tricks, tips and hacks. Meanwhile, you could check out our article on the topic How To Freeze Rows Or Columns In Excel Sheets.


