change Internet time server settings in Windows 10:- The system clock that you see in your Windows system is very important. Every time an update is made to a file, the time from the system clock is used to register the time. Also, for concurrency and synchronization control, ordering of events is of utmost importance. This also relies on the system clock. As default, updates to the system clock are made on a weekly basis. A better option is to enable the Internet Option feature which will make the time more precise and exact.
In order to enable this feature, you need to have a strong connection with the internet. Once the Internet Time feature is turned on, a synchronization is established between the Internet Time Server you choose and your PC system clock. Read on, to learn how to turn on the Internet Time feature on your Windows 10, inorder to establish a synchronization between your system clock and an Internet time server.
Also see:- How to use stopwatch timer alarm feature in windows 10
STEP 1
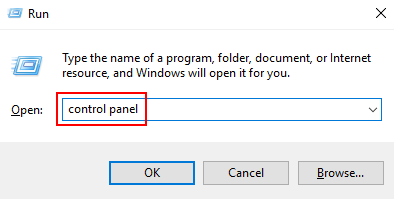
- Press Windows key + R and open RUN.
- Now, write control panel in it and Hit enter to Open control panel.

STEP 2
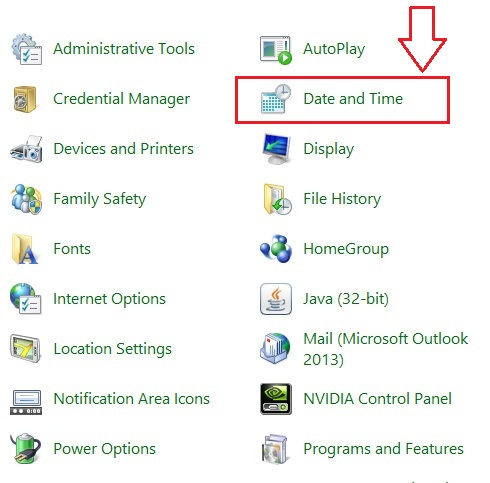
- Now, from the list of options that gets expanded out, find the one named Date and Time and click on it.
STEP 3
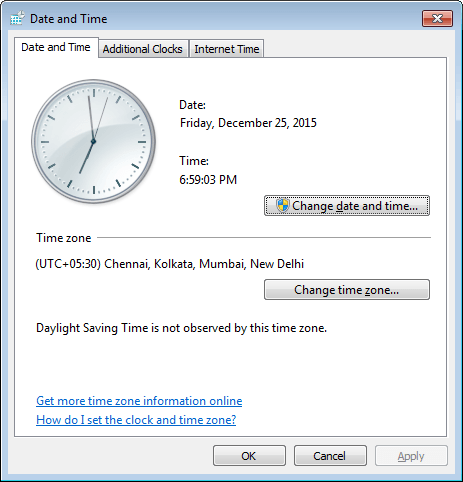
- A new window named Date and Time, having three tabs opens up.
STEP 4
- You got to click on the right most tab, which is the Internet Time tab and then on Change Settings as shown in the screenshot.
STEP 5
- Now a new window named Internet Time Settings opens up, where you can configure the Internet Time Settings. From the Server drop down menu, choose the server with which you want your system clock to be synchronized.
STEP 6
- Once you have selected an Internet time server from the server drop down menu, click on Update now and then on OK buttons for the system clock to get synchronized with the Internet time server that you have chosen.
STEP 7
- If you want to disable the synchronization, you can always opt not to. For that, open the Internet Time Settigs window just like before. To disable synchronization, you need to uncheck the cell for Synchronize with an Internet time server. Finally, click on OK button at the bottom.
Yes, that’s it. Now you can be pretty sure that the time shown by your PC system clock is as correct as it can be. Enabling and disabling the Internet Time feature is as simple as it is explained here. Hope you found the article helpful.


