In Windows 10 it is super easy to create a restore point and you should know it right now, as restore points come as a life saver in emergency situations. Manually creating a restore point at certain intervals makes your mind peaceful. Even if something bad happens, like unintentional installation of a crappy software or messing up of system files on your windows, you can always choose to restore your windows at an earlier created restore point date.
How to Create a Restore Point in Windows 10
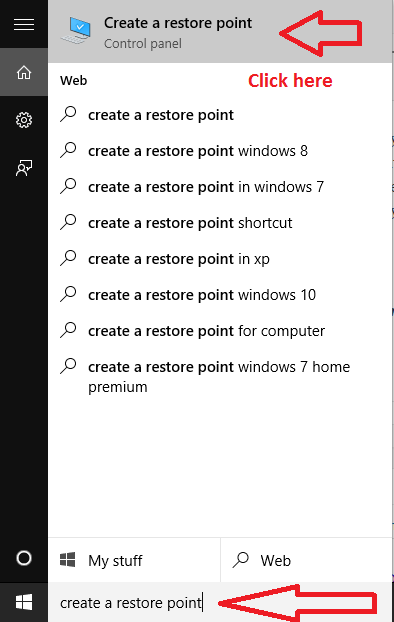
Step 1 – First of all search create a restore point in the windows taskbar in bottom left of your computer screen. Click on create a restore point as shown in the screenshot below.

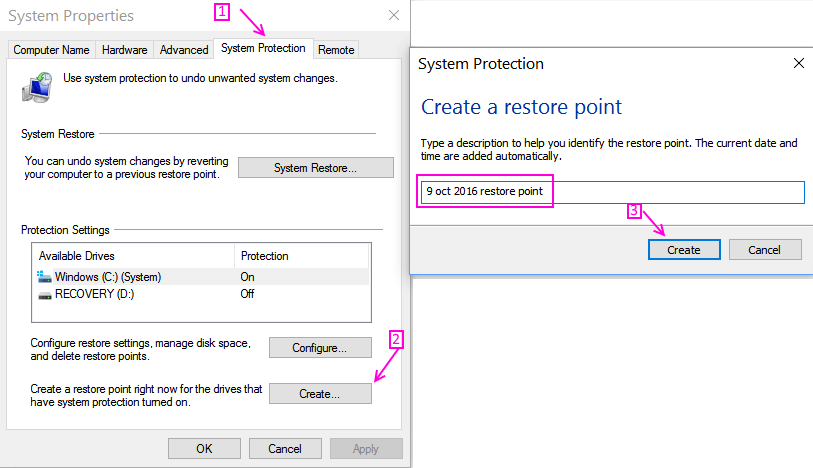
Step 2– First click on system protection tab in the window that appears.
Step 2 – In next step click on create .
Step 4 – finally enter the restore name you wish to provide and then click ok. your restore point will be created.

Step 4 – Enter any name you wish so that you can identify it later. Finally click on create.
Step 5 – It will take a while while the restore point is being created. After that a dialogue box will come out saying your system restore point has been created.

Tip – Its better to name it as date or an important work or a suspicious system file change which you are unsure of.
How to configure system restore settings
Step 1 – In the menu that pops out, you can optionally click on configure first to check settings.

If you have a large hard disk say 1TB or more than 1 TB, its better to drag the max usage to 4-5 % as it will be used for storing system restore backups in case of emergency.
Step 2– If you feel all is Ok at the configuration end, Just press ok.