Printer is a hardware device attached to a PC for printing Letters and Images. Installation of Printers require system files to be configured within the PC. Some printers are pre-defined in Windows. As when they are connected to the computer, the computer identifies the printer & installs it automatically whereas some printers require a setup (Resource CD, Flash Drive) for installation.
Also read: – How to rename a Printer in Windows 10
In this article, we’ll follow certain steps on How to Install a Printer in Windows 10:
Step 1:
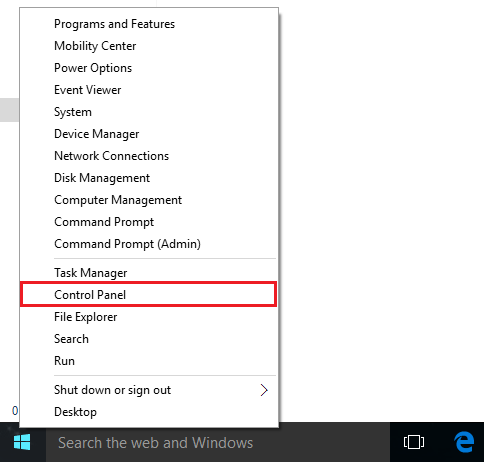
Right click on “Start” icon positioned at the bottom left corner of your screen.
Click on “Control Panel”.

Step 2:
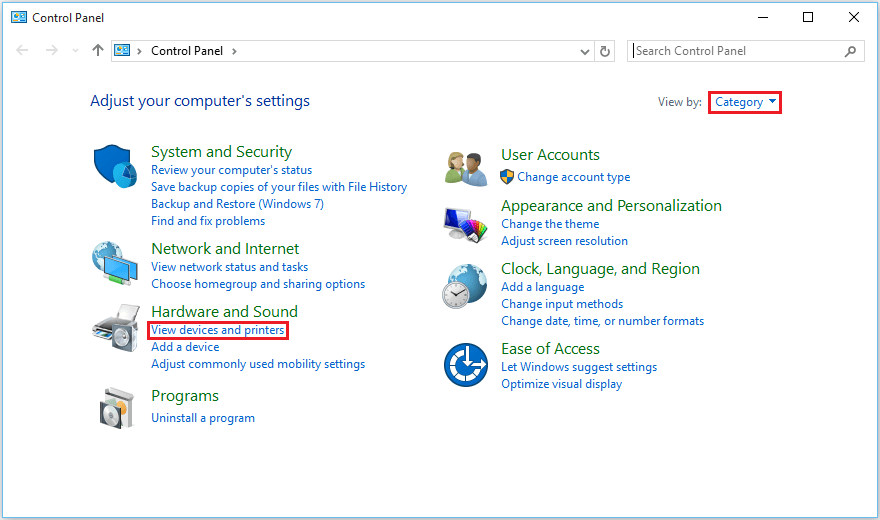
On selecting “Category” view, click on “View Devices and Printers”.

Step 3:
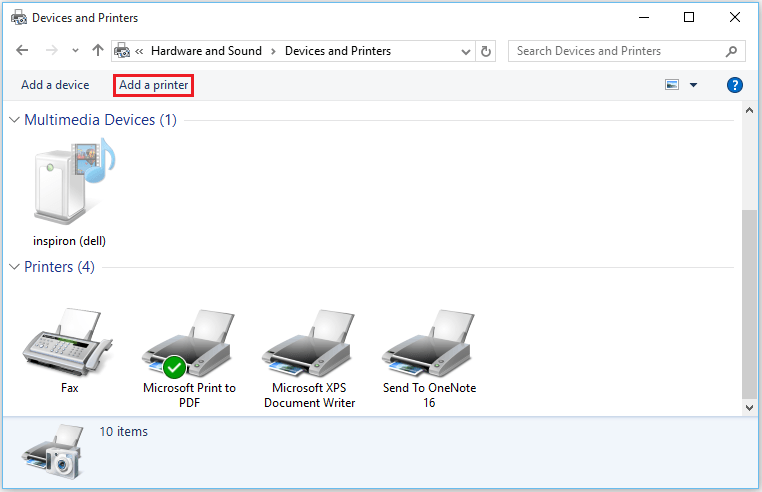
Click on “Add a Printer”.

Note: In some cases, the printers when attached to the PC, gets configured and installed automatically.
If this happens, you may skip the whole process.
Step 4:
If there are several printers that can be added to your PC, select any Printer and click on “Next”.

If you can’t find the printer you wish to install, click on “The printer that I want isn’t listed”.
Step 5:
You can choose any of the given options to install your printer. For instance, we’ve selected on “Adding a Printer using a TCP/IP Address or hostname”.

Click on “Next” to continue.
Step 6:
You can select the “Device type” of your printer by selecting it from the drop down list.
Now, Enter the IP Address of your Printer. For instance, we’ve entered 1.1.1.1
Click on “Next” to complete the process.

As soon as we click on “Next”, the system with the given IP Address contacts with the Printer. If they are connected, the printer is listed on the PC and it can be found under the “Devices and Printers” section in Control Panel.