Suppose that you have decided to upgrade your PC to a newer version. It is rather a hectic task of get a new product key for your Windows system. There are simpler tricks whereby you need not move around to get a whole new product key, which may sometimes require payments. All you got to do is to uninstall the product key in your current pc and use the same on your upgraded PC. If you are wondering how it can be done, then follow the steps in the article in the order provided. But note that this is only applicable for product keys directly brought from the Microsoft. The reuse of product keys wouldn’t work for those product keys that came directly with the system when you had brought it. It is because, it is directly controlled by the hardware which cannot be altered.
Also see: – 17 Free Product Key Finder Tools for Your PC
Let us look at the steps you need to follow to accomplish this.
STEPS TO UNINSTALL CURRENT PRODUCT KEY AND USE IT IN UPGRADED SYSTEM
STEP 1
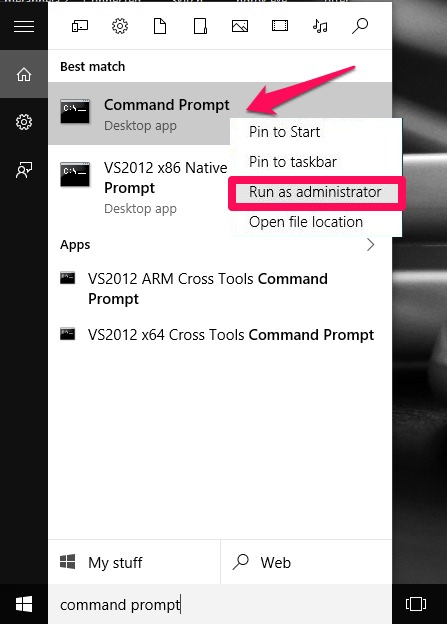
Open up the Command Prompt in your system. Search for it in the search bar provided at the bottom left of your desktop. Also, you will have to open it up in the Administrator mode. For that, right click and choose the option Run as administrator.
STEP 2
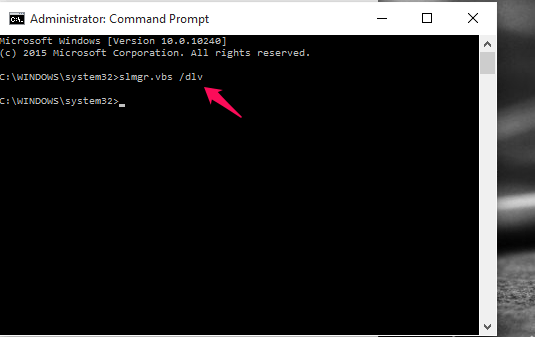
To find out what your current product key is, type the below given command and hit Enter.
slmgr.vbs /dlv
STEP 3
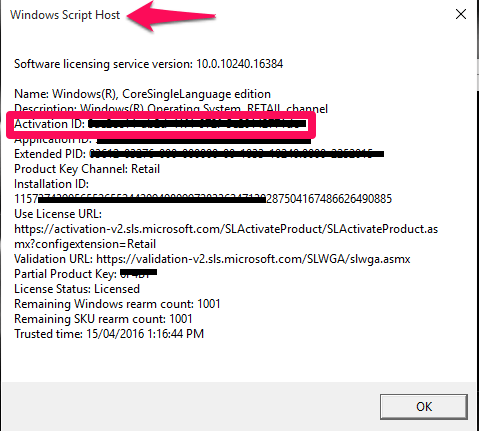
A windows Script Host opens up which contains all the licensing information. You will find your product key just next to the option Activation ID.
I have shaded it for the sake of security purposes.Make a note of it somewhere as you will require it again.
STEP 4
To uninstall the Product key, you will have to type the below given command in the Command Prompt and hit the Enter Key.
slmgr /upk “Product Key”
upk stands for uninstall product key. Replace the product key in the above given command with the actual Activation Key you have just noted down.
Once it is successful, you will get the corresponding success message.
STEP 5
To install in your upgraded system, you will have to type the following command and hit Enter.
slmgr /ipk “Product Key”
ipk stands for install product key.Replace product key above with your actual product key.
That’s all you got to do. You can now enjoy using your upgraded PC with the same product key.Hope you found this article useful!.


