How to restrict PC usage time of local account in Windows 10 and set time restrictions: – In the brand new version of Windows, Windows 10, it’s a bit hard to set parental controls to local accounts as a number of features are now linked with your Microsoft account. But of course, you can’t let your kids mess up with your works by giving them the administrator account, with restrictions. Local accounts are definitely a must and it should be easy to place at least time restrictions on local accounts. Read on, to place time restrictions on local accounts by using the Command Prompt, with a very few number of easily executable steps.
Also see : – How to create a secret Hidden user account in windows 10
STEP 1
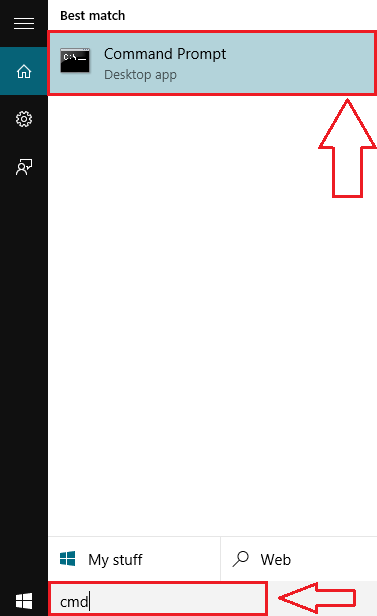
- First of all, type in cmd to your Cortana Search Box as shown in the screenshot. This will result in the displaying of the search results with Command Prompt at the top.
STEP 2
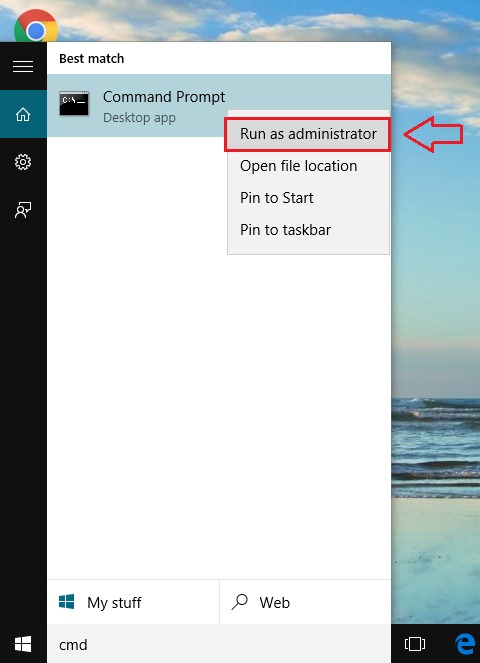
- Now execute a right click on the Command Prompt and from the context menu that appears, click on Run as administrator to run the command prompt with administrative privileges.
STEP 3
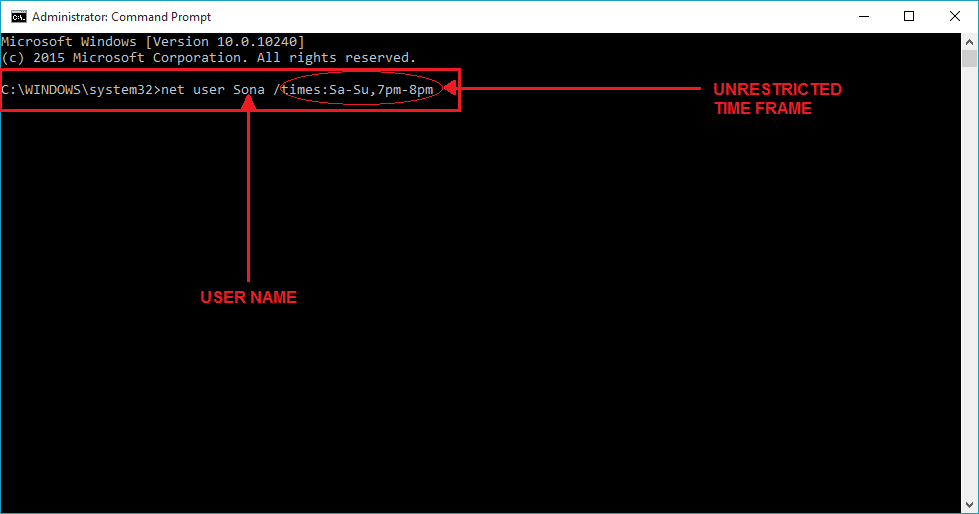
- The execution of the previous step will result in the opening of the Command Prompt, with administrative privileges. Now type in or copy-paste the following command and hit Enter.
net user username /times:timeframe
- You have to replace the username portion of the code with the Username of the account that you want to set restrictions to. Also, replace the timeframe portion of the code with a time frame of your choice. The time that is specified in the timeframe will be the only frame of time during which the user will be able to access the restricted account. An example for a time frame is : sa-sun,12am-1pm;M-W,6pm-8pm;F-su,12pm-5pm. Refer the below screenshot incase you have any doubts.
STEP 4
- Once you have successfully completed the previously mentioned step, the command prompt will show a message which says The command completed successfully. This means that the restriction has been placed.
STEP 5
- Now let’s check whether this actually works. For that, you need to log off from the administrator account and then try to sign in to the account that you have placed restrictions on. To do that, simply click on Start menu, and then on the User Name at the top. Find the account that you have placed the restrictions on, and click on it.
STEP 6
- There you are! The restrictions are on place, as it is displayed by the lock screen of your Windows.
STEP 7
- You can always cancel the time restrictions that you have put on user accounts. For that, sign in to the adminstrator account and run the Command Prompt in administrator mode just like before. Now type in the following code into the Command Prompt.
net user username /times:all
of course, you have to change the username to the specific user account name, as shown below.
That’s it. Now you can can let your children access time restricted local accounts, as simple as that. Hope the article was found useful.


