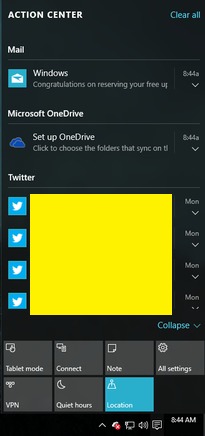
How To Set Priority Levels For App Notifications In Windows 10 Action Center:- One of the most striking features that got released with the Windows 10 update is the Windows 10 Action Center. It is located at the notification area in your taskbar. It is a highly useful feature which, if used efficently, can bring you all the system and social media related notifications right at one place. Let’s say you get a lot of notifications in your Windows 10 Action Center from different apps. Things could get super messy if these notifications are shown to you in no specific order. In this article, I have explained how to set priority levels for app notifications in Windows 10 Action Center such that you can get an organized view of your app notifications. Read on, to learn how to hack this simple trick.
STEP 1
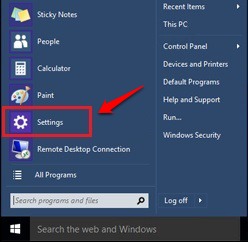
- Click on the Windows icon and then on Settings option to the launch the Settings app.
STEP 2
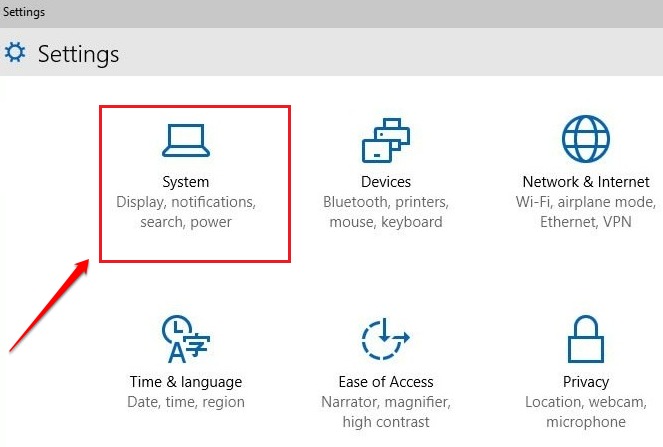
- When the Settings app launches, find and click on the tile named System.
STEP 3
- In the left pane of the Systems window, you will be able to see an option named Notifications & actions. Click on it to get to the next step.
STEP 4
- In the right window pane, scroll down and find the section named Senders. Under the Senders section, you will be able to see the list of apps that gives notifications at the Windows Action Center. You can turn off the apps from this list if you do not want them to clutter up your Windows Action Center with notifications anymore. To set priority levels for app notifications, click on the respective app. In the following screenshot, I have chosen Cortana as an example.
STEP 5
- There will be a drop down menu associated with the option Number of notifications visible in action center. From this drop down menu, you can limit the maximum number of notifications that a particular app can show at the Windows Action Center. There will be another section that says Priority of notifications in action center. There are three priority levels; Top, High and Normal. Let’s say you have selected the radio button corresponding to the Top priority level for an app. Then if 2 notifications come from two apps, one from Top priority app and another from High priority app, then the notification from the Top priority app will be shown above the High priority app notification. If 2 notifications from the same priority level apps come, then the notifications are shown based on the timestamps generated for the notifications.
Prioritize your app notifications today itself to see only what you want to see. Hope you found the article useful. If you have any doubts regarding any of the steps, please feel free to leave comments, we would be happy to help. Stay tuned for more useful tricks, tips, and hacks. Meanwhile you could check out our article on the topic How To Remove Quick Action Buttons In Action Center.


