How To Capture Screenshots From Chrome And Firefox Browsers Without Any Extensions:- Have you been looking for ways to capture screenshots from your favourite browsers like Google Chrome and Mozilla Firefox without the help of any of the extensions? Well, if you never have been, you could start looking now! But your search has come to an end even before it has started. Yes, we have got the perfect solution right here for you, all neatly stacked up. Dive into the article to learn how to hack this simple trick.
Take Screenshot in Google Chrome without any extension
STEP 1
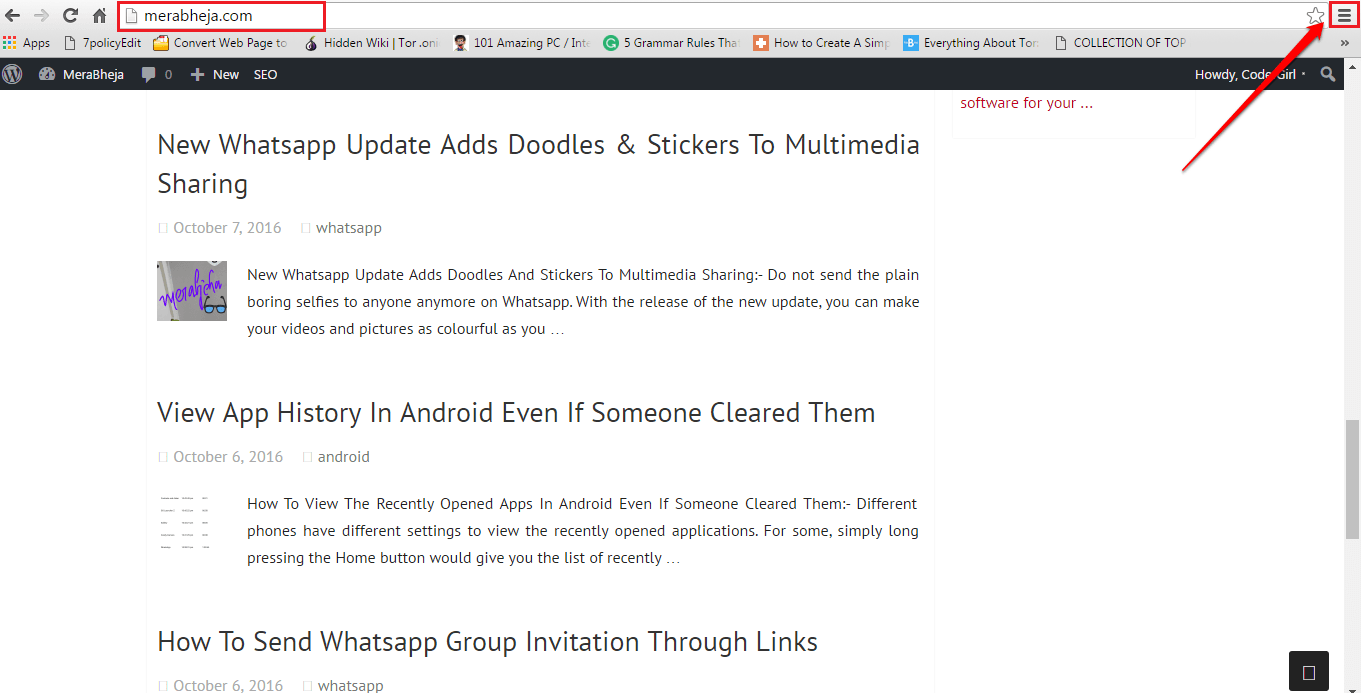
- Launch Google Chrome and go to the web page that you want to take the screenshot of. Once you are there, hit the More actions icon at the top right corner of the web page.
STEP 2
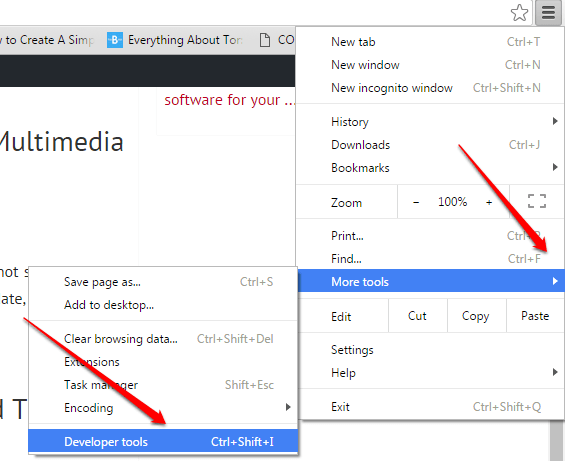
- From the options that get expanded out, click on More tools and then on Developer tools.
STEP 3
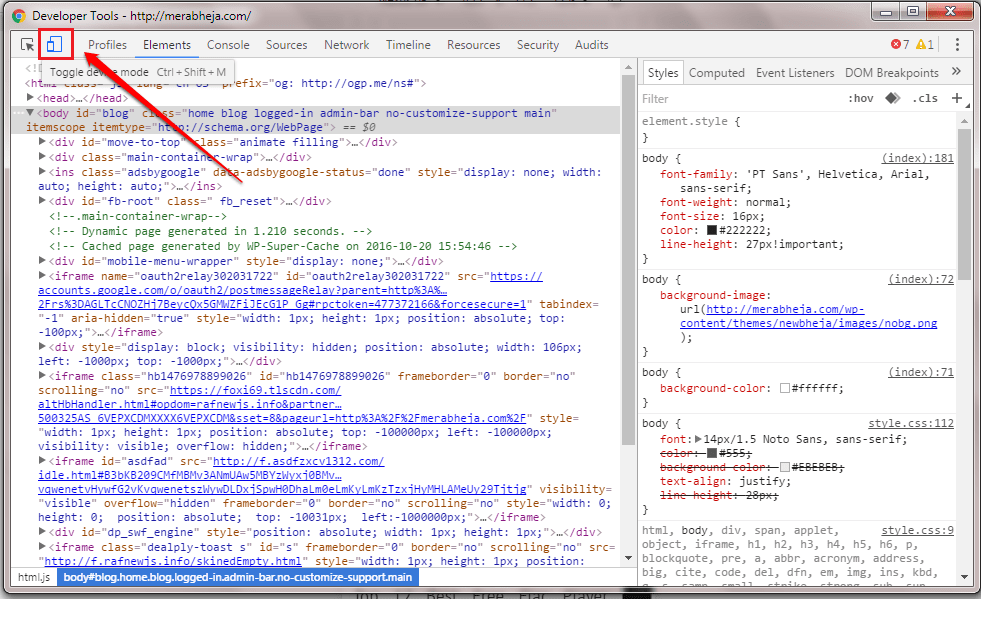
- A small window for Developer Tools will open up. Click on the Toggle Device Mode button as shown in the screenshot given below to activate it. It will appear blue in colour once it is activated.
STEP 4
- Minimize the Developer Tools window. In the web page behind it, you will be able to set up your screenshot. You can choose your device type for your screenshot from the device drop down menu.
STEP 5
- You can also set up the size of your screenshot and its orientation by using the options shown in the following screenshot.
STEP 6
- Once everything is done, click on the 3 dots icon at the top right corner. From the options that get expanded out, click on the one that says Capture screenshot. Well done, you have taken a screenshot right from your Chrome without the help of any of the extensions.
Take Screenshot in Mozilla Firefox without any extension
STEP 1
- Just like in Chrome, launch Mozilla Firefox and go to the web page that you want to take the screenshot of. Once you are there, click on More Actions at the top right corner and then click on the Developer tile.
STEP 2
- As next, click on Responsive Design View option as shown in the screenshot given below.
STEP 3
- You can set up the size and orientation for your screenshot by using the options given at the top. Once you are all set, hit the Camera icon to capture the screenshot.
STEP 4
- That’s it. Now just give a location and a name for your screenshot and hit the Save button. Yes, we are done.
Hope you found the article useful. If you have any doubts regarding any of the steps, please feel free to leave comments, we would be happy to help. Stay tuned for more useful tricks, tips, and hacks.


