Windows 10 offers the flexibility of changing orientation for normal viewing. Commonly, there are two basic modes of orientation used for viewing untill now. They are: – Portrait and Landscape
Landscape mode allows the wider part of the image to be covered in which the width of the image is more than its height (e.g. Panoramic View) whereas Portrait mode allows the height of the image to be more than its width (e.g. Book View).Whenever the angle of rotation of the screen changes to 90°, the modes are inter changed (i.e. Landscape to Portrait and vice-versa) and when the angle of rotation of the screen changes to 180°, the modes are flipped (i.e. Landscape to Landscape (flipped)).
In computers, Landscape mode is preferred over the Portrait mode whereas in Mobile phones/ Tablets, Portrait mode is the sole option for display.
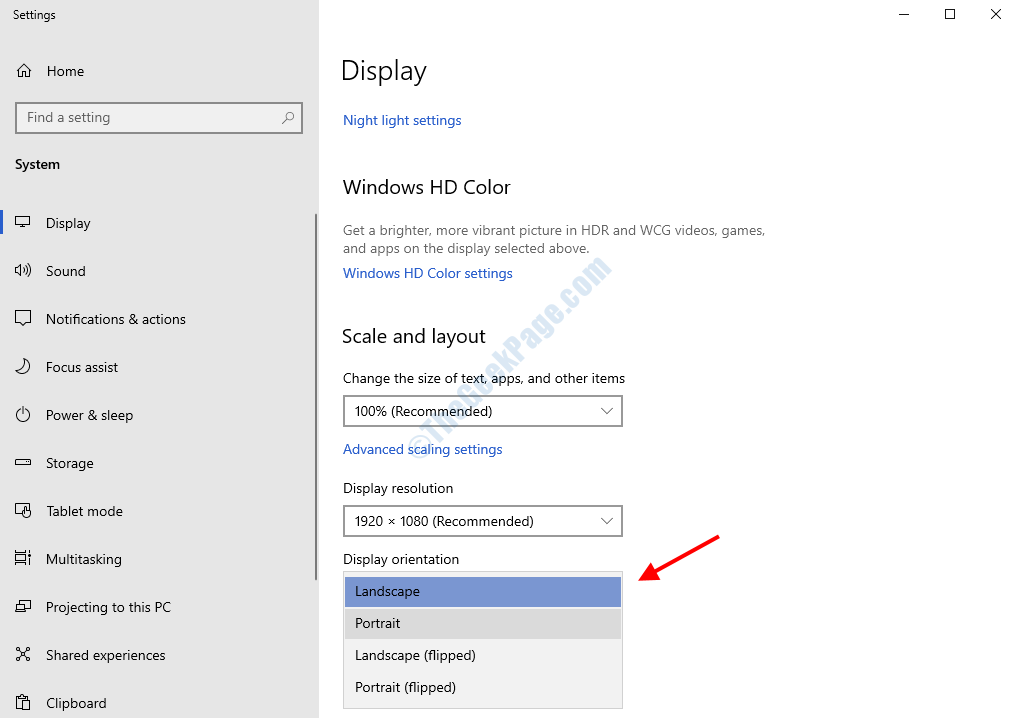
Windows 10 allows four different ways of Orientation. They are:-
-
Landscape
-
Portrait
-
Landscape (flipped)
-
Portrait (flipped)
These modes are categorized below “Customize of display” section that can be found under the “Settings” app in Windows 10.
how to change orientation of your screen in Windows 10.
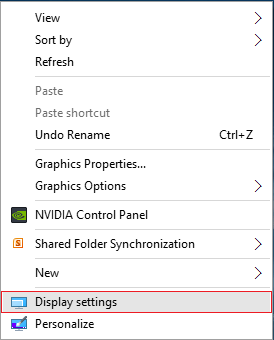
Step 1: Right-click on the desktop screen anywhere and click on “Display settings” for direct path access to the display configuration settings under the “Settings” app.

Step 2: Under Display section, look for “Orientation”. In “Orientation” section, click below the drop down menu to choose any one of the following options.

If you choose any other option apart from the current viewing mode, a confirmation message will be displayed like this:

The confirmation message will start a 10 second timer for the user to decide whether he wants to go with the changed orientation or reverting back to the current one. If the users fails to choose between the two options, they current viewing mode will stay subsequently.