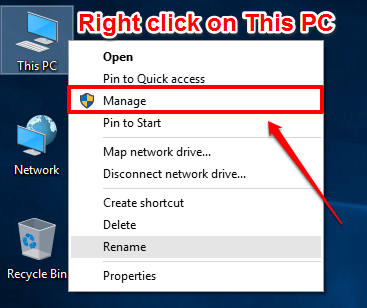
How To Enable/ Disable The “Manage” Option Under “This PC” In Windows 10:- When you right click on the This PC icon, in the context menu that appears, you will be able to find an option named Manage. The Manage option is a very powerful option. You might not want other users of your computer using this function. In that case, you can always disable this option. Dive into the article to learn how to hack this simple trick with some very easy steps.
STEP 1
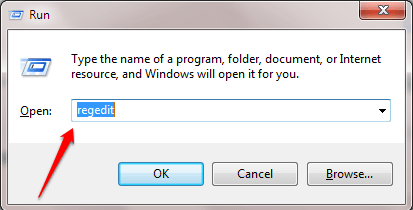
- Press WIN+R keys together to open the Run dialog box. When it opens up, type in regedit and hit enter key.
STEP 2
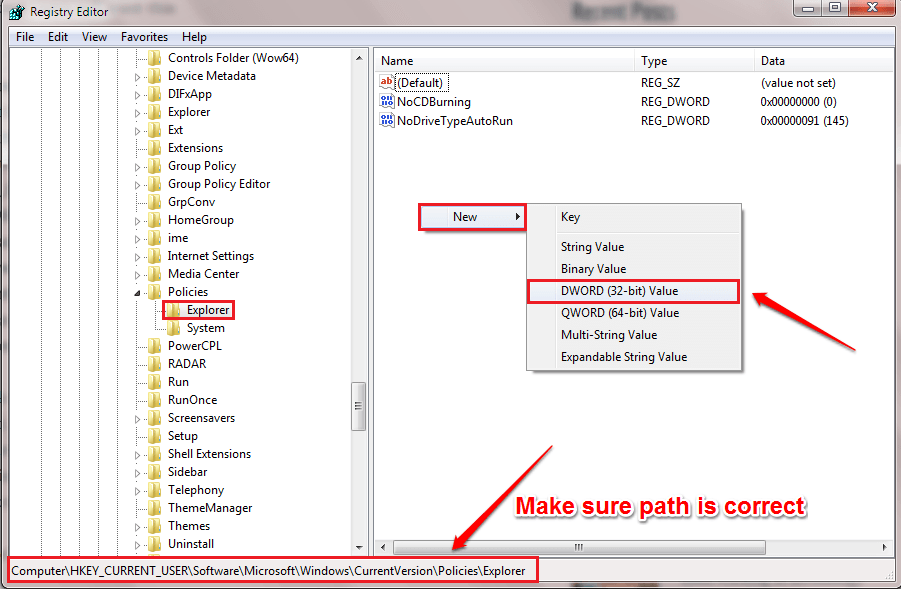
- This will open up the Registry Editor window for you. As next, you need to navigate to the following path:
HKEY_CURRENT_USER\SOFTWARE\Microsoft\Windows\CurrentVersion\Policies\Explorer
- Make sure the path you have navigated to is corrrect. Highlight Explorer key by clicking on it. In the right window pane, look for an entry named NoManageMyComputerVerb. If there is no such entry, right click on an empty space in the right window pane, click on New and then on DWORD (32-bit) Value.
STEP 3
- Name the newly created DWORD value as NoManageMyComputerVerb.
STEP 4
- Double click on the NoManageMyComputerVerb DWORD value to edit its Value data. If you want to disable the Manage option under This PC or My Computer, then enter 1 as the value in the Value data field. Hit OK button. The changes will take place with the next system boot.
If you want to go back to the initial settings of having the Manage option under This PC, then you can always delete the newly created NoManageMyComputerVerb DWORD value. Hope you found the article useful. If you are stuck with any of the steps, feel free to leave comments, we would be happy to help. Stay tuned for more tricks, tips, and hacks.


