TELNET stands for TELecommunication NETwork. Telnet was evolved in the year 1969 and it became standardized as an Internet Standard STD-8 which was one of the first internet standards. Telnet is a text-based program in which you can connect other computers using the internet. Telnet is a part of application layer protocol like HTTP (Hyper Text Transfer Protocol) and FTP (File Transfer Protocol) which is used on the internet or local area networks to produce a two-way interactive text-oriented communication facility with the help of a virtual terminal connection.
Generally, Telnet is used for accessing remote computers. Telnet program runs on the local computer and connects the computer to a server on the network. Commands can be entered through the Telnet program and they will be executed if entered directly on the server console. This enables the user to control the server and communicate with other servers on the network. To start a Telnet session, one must log in to a server by entering a valid username and password.
Telnet is also called client-server protocol as it is based on reliable connection-oriented transport. A special application of telnet, “reverse telnet” is also used where the server side of the connection reads and writes data to a terminal line in place of providing a command shell.
The following steps in this article will show how to turn on/off Telnet Client in Windows 10 and Windows 11:
How to Enable / Disable Telnet Client
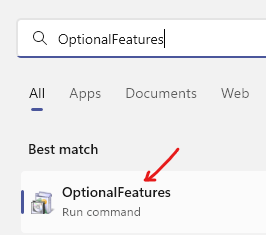
Step 1: Search OptionalFeatures in Windows search
Step 2: – Click on OptionalFeatures from search result.

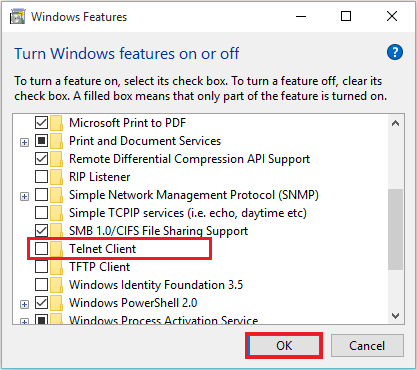
Step 3: Click on “Telnet Client” to Disable this feature. Click on “OK” to finish this process.
If you want to Enable it Just select Telnet client to get a tick mark before it
Note: A check mark indicates that all of its features are turned on and a filled box indicates that only the part of the feature is turned on.
