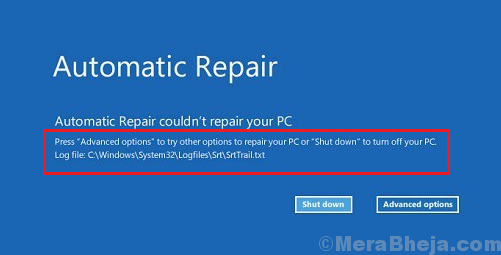
A system wears and tears with time, not only the hardware but the software too. Windows 10 has an in-built mechanism to repair the system at Startup should it face any such issues. However, at times the automatic repair mechanism of the system could fail and users might get the following error:
Automatic/Startup Repair couldn’t repair your PC . Press “Advanced options” to try other options to repair your PC or “Shut Down” to turn off your PC. Log file: C:\Windows\System32\Logfiles\Srt\SrtTrail.txt
Since users might not be able to boot into the system in normal mode, we might have to perform the troubleshooting using recovery mode. Try the following solutions:
Solution 1] Repair BCD and MBR
To repair Boot Configuration Data and Master Boot Record, we would have to use Command Prompt in Recovery mode.
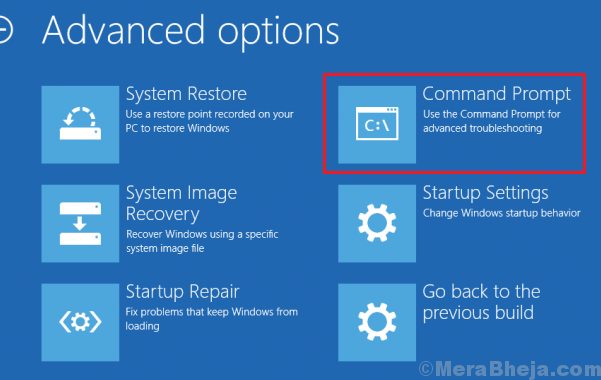
Now , click on “Advanced options“ in the next screen.

1] Once you are here , follow the steps as shown below.
2] Select Troubleshoot >> Advanced options >> Command Prompt.
3] Type the following command and press Enter after each command to execute it:
bootrec.exe /rebuildbcd

bootrec.exe /fixmbr

bootrec.exe /fixboot
4] There command would help resolve issues with the boot sectors.
5] Restart the system and check if it helps.
Solution 2] Run CHKDSK
The CHKDSK command helps in checking bad sectors in the hard drive and repairs them if possible.
1] Open Command Prompt in Recovery mode as suggested in Solution 1.
2] Type the following command and press Enter to execute it:
CHKDSK /f /r
3] Restart your system and check if it works this time.
Solution 3] DISM command and SFC scan in recovery mode
The DISM command and SFC scan checks for missing files in the system and replaces them if possible.
1] Open Command Prompt in recovery mode once again as explained in Solution 1.
2] Type the following command and press Enter to execute it:
DISM /Online /Cleanup-Image /RestoreHealth
3] Thereafter, type the following command and press Enter to run the SFC scan:
sfc /scannow
4] Restart the system.
Solution 4] Disable Early launch anti-malware protection
One of the causes of the issue is that the anti-virus software might be interfering with the automatic repair process. However, we cannot log in to the system to disable or uninstall the anti-virus software, thus we would have to do it through an option in the recovery mode.
1] Reboot your system in recovery mode and explained in as Solution 1.
2] Go to Troubleshoot >> Advanced options >> Startup Settings.
3] Click on Restart on the Startup Settings page. It would display a list of options and we need to choose the option by entering the appropriate number.
4] Select number 8 which represents Disable early launch anti-malware protection.
5] Restart the system and check if it helps.
Note: This procedure might not be able to disable all third-party anti-virus software.
Solution 5] Disable automatic Startup Repair
For the time being, if automatic repair is not working, we could disable it to log in to the system.
1] Open Command Prompt in the recovery mode as explained in Solution 1.
2] Type the following command and press Enter to execute it:
bcdedit /set recoveryenabled NO
3] Restart your system and check if disabling automatic startup repair allows you to boot into the system. Thereafter, you could perform the earlier explained troubleshooting in normal mode.
Solution 6] Registry level fix
If everything else fails, we could attempt a Registry level fix to resolve the issue.
1] Open Command Prompt in recovery mode as explained in Solution 1 for the last time.
2] Type the following command and press Enter to execute it:
copy c:\windows\system32\config\RegBack\* c:\windows\system32\config
3] Reboot your system and check it boots properly this time.
This exhaustive troubleshooting guide should be helpful in resolving your issue.


