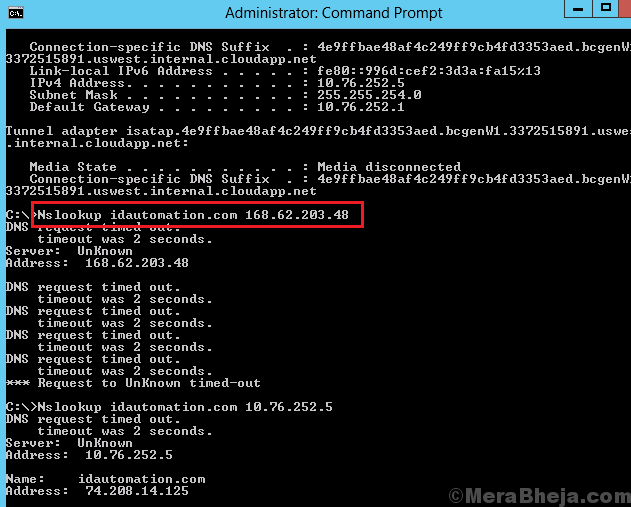
Imagine a situation where certain websites on your system aren’t working, however the Internet is connected (which is evident by other websites which are opening). The websites which are not working on your system could be working on other devices (eg. your phone). In this situation, it could be understood that the issue is with the system itself.
In such a situation, we could use two command line tools: ping and nslookup. We open the Command Prompt window after searching through Windows search and use these commands. Eg. ping <website name>, nslookup <website name>.
The ping command sends packets of information to the IP address or the domain and checks for replies. However, it does not lookup to the DNS, something which is done by the nslookup command.
If the ping command gives all 4 replies but nslookup gives the error “Could not find host,” this post could be of help to you.
Thereafter, proceed with the following solutions:
Solution 1 – Try adding a dot at the end in Ping command
Try appending a dot at the end of command. For example, if your command is ping hostname , then change it to ping hostname.
Solution 2] Force Windows to do a DNS lookup by using FQDN
1] Press Win + R to open the Run windows and type the command ncpa.cpl. Hit Enter to open the Network Connections window.
2] Right-click on your network and select Properties.
3] In the list, double-click on Internet Protocol Version 4.

4] In the Internet Protocol Version 4 Properties window, select Advanced.
5] In the DNS tab, shift the radio button to Append these DNS suffices (in order).
6] Click on Add.
7] In the Domain suffix, add a dot (.) and click on Add again.
8] Click on OK to save the settings and restart the system.
Solution 3] Flush DNS, reset Winsock and reset TCP/IP
1] Search for Command Prompt in the Windows search bar and right-click on it. Select Run as administrator.
2] Type the following commands one by one and press Enter after each command separately to execute it:
netsh winsock reset catalog

netsh int ip reset reset.log

ipconfig /flushdns

ipconfig /registerdns

route /f
3] Restart the system once all the 3 commands have executed.
Solution 4] Use Google’s public DNS
1] Press Win + R to open the Run windows and type the command ncpa.cpl. Hit Enter to open the Network Connections window.
2] Right-click on your network and select Properties.
3] In the list, double-click on Internet Protocol Version 4.

4] Shift the radio button to Use the following DNS server addresses and change the entries as follows:
Preferred DNS address: 8.8.8.8
Alternate DNS address : 8.8.4.4
5] Click on OK to save the settings.
6] Restart the system and check if it helps.
Solution 5] Restart DNS Service
1- Search cmd in Search box.
2 -Right click on Command prompt which appears in search result and then click on Run as administrator.

3 -Now, run the command given below.
net stop dnscache
4-Now, run the command given below to start DNS cache service again.
net start dnscache
5 -Close the command prompt window.
Solution 6] Disable IPV6
1] Press Win + R to open the Run windows and type the command ncpa.cpl. Hit Enter to open the Network Connections window.
2] Right-click on your network and select Properties.
3] Disable Internet Protocol Version 6 (Uncheck it)

4] Click OK.
Solution 7] Check the Host file to verify if the unreachable website has been blocked
The Host file is located at the path C:\Windows\System32\drivers\etc. While we might not make changes to it, installing a new application or a virus/malware could cause changes to the file. Open the Host file in Notepad and check what all sites have been blocked. The entry could be delete to unblock the website.
It is also advised to run a full system anti-virus and anti-malware scan if the Host file was modified.
Solution 7] Delete WLAN Profiles
1] Search for Command Prompt in the Windows search bar and right-click on the option. Select Run as administrator.
2] Type the following command and press Enter to execute it:
netsh wlan delete profile name=”<name of the network>“
Replace <name of the network> with the Network profile.
3] Restart the system.
Solution 8] Reinstall the Network Adapter drivers
1] Press Win + R to open the Run window and type the command devmgmt.msc. Press Enter to open the Device Manager.
2] Expand the list of Network Adapters and right-click >> Update driver for each Network Adapter one by one.
3] Restart the system to save the changes.
Solution 9] Power-cycle the modem, router, and computer
1] Switch OFF the modem, router, and computer.
2] Switch ON the modem only and let the lights become stable.
3] Now switch ON the router and let its lights become stable.
4] Finally, switch ON the computer.
5] Check if it resolves the issue.
We hope this exhaustive troubleshooting guide helps in resolving the issue.