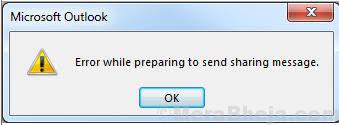
Many users have reported that while attempting to send a calendar invite through Outlook they get the following error:
Error while preparing to send sharing message
Where “sharing message” refers to the calendar invite.
This error usually occurs with Outlook 2007, 2010, and 2016. A noteworthy observation is that most users who reported the issue were able to send the email invite through the online app of the mailbox mappen on the Outlook desktop client.
Causes
The causes behind the issue are as follows:
1] The files responsible for acting a bridge between the Calendar app and Outlook might be damaged.
2] An add-in might be causing the issue.
3] Issue with Calendar permission files on the system.
4] The system time might be incorrect
Preliminary step
Before anything else, try sending the calendar invite through the web application (eg. gmail.com, hotmail.com, etc.) of your email server. If it doesn’t work with the web application either, then there’s no point in troubleshooting with the system. You could contact your email service provider for the same.
Thereafter, proceed with the following solutions:
1] Check the system date and time
2] Use the Microsoft Support and Recovery Assistant for Office 365
3] Remove troublesome add-ins
4] Re-install Microsoft Office completely
Solution 1] Remove troublesome add-ins
At times some troublesome add-ins cause this issue. We could test this, and if the issue is with one of the add-ins, we could investigate and remove the same.
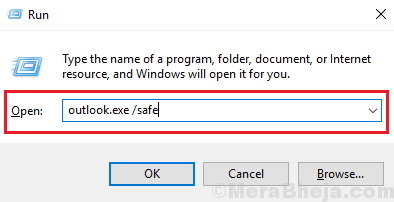
1] Press Win + R to open the Run window and type the command outlook.exe /safe. Press Enter to open the Outlook desktop app in Safe mode. When we open the Outlook desktop client in Safe mode, the add-ins would be disabled.
2] Now try sending the Calendar invite. If it works, the issue is with one of the add-ins.
3] Close the Outlook Safe mode window and open the Outlook client in normal mode.
4] Go to File >> Options >> Add-ins.
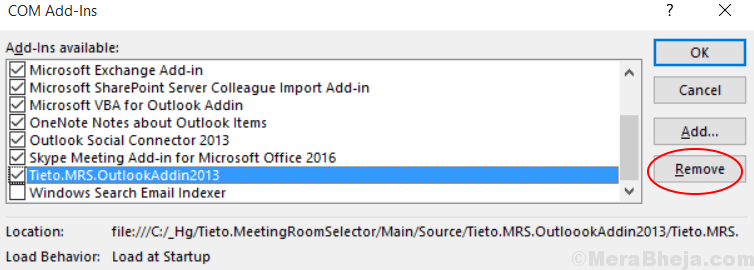
5] Choose the drop-down menu corresponding to Manage to COM Add-ins and click on Go.
6] Check and Remove any add-in that is suspicious. This would be more of a hit and trial activity.

Solution 2 – Remove Previous Microsoft Office Login Credentials
1. Press Windows Key + R together to Open RUN command Box.
2. Now, Write control /name Microsoft.CredentialManager in the run command box and Click OK.

3. Now, Choose Windows Credentials.

4. Now, Expand Microsoft Office Credentials from the List and Remove it.

Solution 3- Remove Duplicate Entry
- Right Click on the users calendar and select Properties.
- Choose permission tab.
- Go to users list and make sure that there aren’t any duplicate entry.
- If there is any Duplicate entry , Remove it.
- Once you remove the Duplicate Entry , Just restart Outlook again.
Solution 4] Use the Microsoft Support and Recovery Assistant for Office 365
The Microsoft Support and Recovery Assistant for Office 365 can be downloaded from here. Run this troubleshooter for the Outlook desktop client. It check for all possible causes of the issue and tries to resolve it if possible.
Solution 5] Re-install Microsoft Office completely
If everything else fails, you could consider re-installing the Microsoft Office package. However,it is necessary to remove all components of the software package. To do so, download the tool mentioned in Option 2 here. Thereafter, reinstall the Microsoft Office package.
Solution 6] Check the system date and time
The Outlook client or rather any software installed on the system uses the system clock to check the time and use it for functions. Check the system time at the right-bottom corner of the screen. If it is wrong, you might have to correct it.
1] Search for Control Panel in the Windows search bar and open the same.
2] Go to Date and Time and then to the Internet time tab.
3] Click on Change settings.
4] Select the Server to time.nist.gov and then click on Update now.
5] Click on OK to save the settings.

