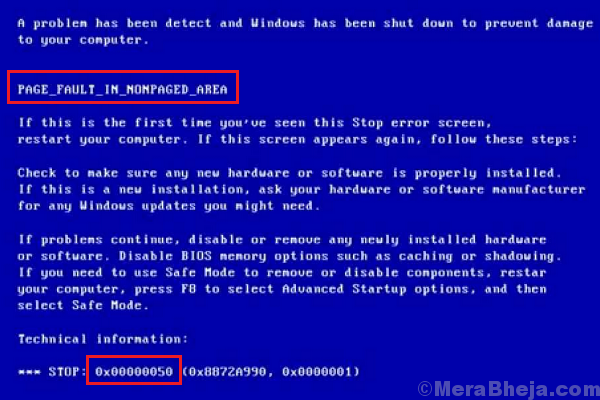
The PAGE_FAULT_IN_NONPAGED_AREA 0x00000050 Blue Screen of Death indicates that the system is under heavy load.
Fix PAGE_FAULT_IN_NONPAGED_AREA 0x00000050 error
Causes
The main cause is that invalid system memory has been referenced. It could be caused by a recently attached hardware or a recently installed program on the system. Other causes include an interfering anti-virus program, a corrupt NTFS volume, etc.
Preliminary steps
1] Remove any recently connected hardware and reboot the system. Also, if the system is accessible, uninstall any recently installed suspicious program.
2] Disable your anti-virus software.
3] Update Windows: Updating Windows also updates the driver and could thus be helpful for our cause. Here’s the procedure to update Windows.
Thereafter, proceed with the following solutions:
Note: In case you are unable to log in to the system, try booting to the system in Safe Mode. Here’s the procedure to boot into a system in Safe Mode.
Solution 1] Run a memory test on your system
Since the issue is with the system memory, we could run a memory test to analyse the solution and resolve it if possible.
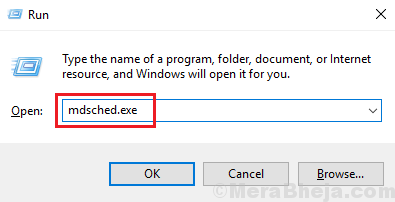
1] Press Win + R to open the Run window and type the command mdsched.exe. Press Enter to open the Windows Memory Diagnostics Tool.
2] Select the option Restart now and check for problems (Recommended).
3] The system will restart and automatically check for issue. It would fix any problems if there.
Solution 2] Run SFC scan
An SFC scan would help check for missing files in the system, which could in turn affect the memory of the system. Here’s the procedure for an SFC scan.
Solution 3] Disable Automatic Paging File Size Management
1] Search for Control Panel in the Windows search bar and open it.
2] Go to System.
3] On the list on the left-hand side, select Advanced System Protection.
4] Go to the Advanced tab.
5] Click on Settings under the performance section (there are 3 Settings on the page so be careful).
6] Go to the Advanced tab in Performance options.
7] In the Virtual Memory section, click on Change.
8] On the next window, uncheck the box corresponding to Automatically manage paging file size for all drives.
9] Highlight your system drive (usually C:) and select the radio button at Custom size.
10] Increase both the Initial size and Maximum size to a higher value.
11] Click on Set to save the value and then on OK.
12] Restart the system and check if it helps with the issue.
Solution 4] Update the device drivers
The issue could have been caused by obsolete drivers and updating the drivers could be helpful in fixing the issue. Here’s the procedure to update device drivers. However, it would be very difficult to update all drivers one by one, thus third-party software products could be helpful for the same. You could also use the Automatic update option on Intel’s download center website.
Solution 5] Use System Restore
Using System Restore to revert your system to a previously known stable state would be helpful in resolving the problem.
1] Search for Control Panel in the Windows search bar and open it.
2] Go to Recovery.
3] Select Open System Restore.
4] Select a Restore point and click on Next.
4] Confirm the Restore point and click on Confirm to initiate the restore process.
Solution 6] Run the CHKDSK command
The CHKDSK command helps in checking bad sectors of the hard drive and repairs them if possible. Here’s the procedure to run a CHKDSK scan.
Solution 7] Update the BiOS of the system
To update the BiOS of the system, search for the latest version on your system manufacturer’s website.


