Any device which uses either the microphone or the speaker needs to access the sound card. The same is true for Skype. However, at times, users report the issue where they get the following error while trying to use Skype:
Skype can’t access Sound Card
Cause
The cause behind this error is that a few Window updates messed up thing because of which Skype would face issues connecting to the sound card. Another reason is when you change the version of Windows on your system while keeping the files at the same place (eg. upgrading from Windows 8.1 to Windows 10). This causes the permissions to mess up the access to and fro the system.
The problem could also be if we do not update the sound card drivers while updating Skype to a later version.
We could troubleshoot the issue step by step to resolve it:
Solution 1] Allow apps to use the microphone
At times, the setting which is to allow apps to use the microphone is turned OFF. We need to turn it back ON before anything else.
1] Click on the Start button and then the gear-like symbol to open the Settings page.
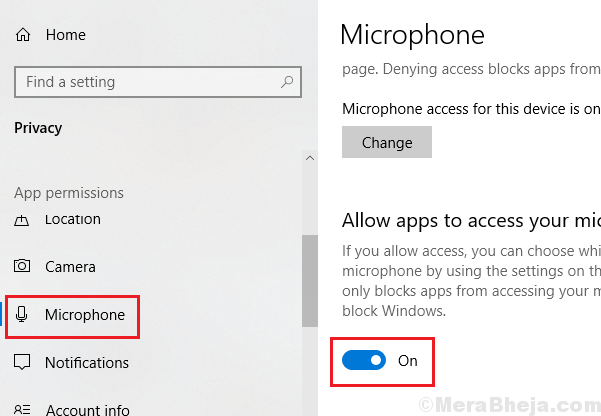
2] Go to Privacy and then Microphone from the left menu..
3] Turn the setting Allow apps to access your microphone to ON.
Solution 2] Use the Hardware and Devices troubleshooter
Since the issue is with access to the sound card, the Hardware and Devices troubleshooter could be helpful in identifying and resolving the problem.
1] Click on the Start button and then the gear-like symbol to open the Settings page.
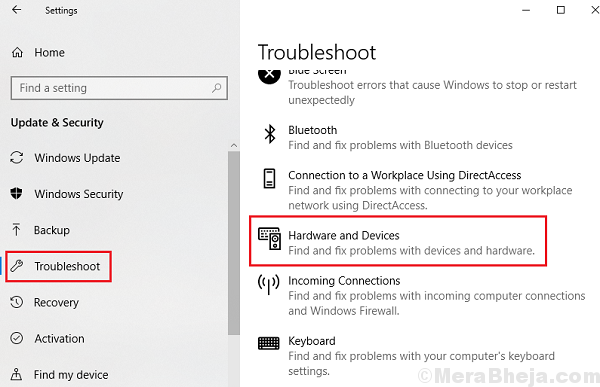
2] Go to Updates and security and then to the Troubleshoot tab.
3] Select the Hardware and Devices troubleshooter and run it.
4] Restart the system.
You could also try running the Windows store apps troubleshooter for problems with the Skype app.
Solution 3] Update Windows
As mentioned earlier, one of the cause behind the error is a messed up Windows update. If Microsoft is aware of this fact (or whenever it is made aware), the company would perhaps find a solution for this problem and push it in form of a Windows update. Here is the procedure to update Windows.
Solution 4] Update the Audio inputs and outputs drivers
If the drivers weren’t updated on time, updating them could help quite a lot with the resolution. Here’s the procedure to update drivers. Make sure you update the Audio inputs and outputs drivers.
Solution 5] Do a clean reinstall of the Skype application
A clean uninstall of Skype means removing every trace of Skype from the system. While it is a complex process, proceed with it step by step to do it right:
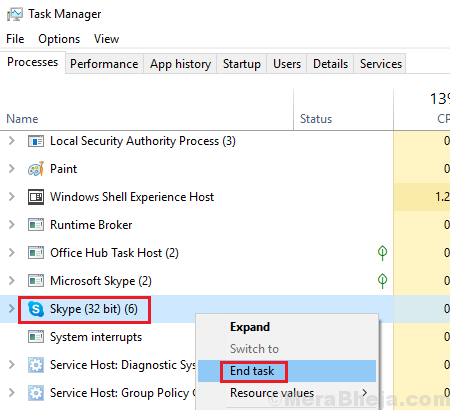
1] Quit Skype and that doesn’t simply mean closing the application. A better idea would be to press CTRL+ALT+DEL to open the security options window and select Task Manager. Find the Skype process, right-click on it and select End task.
2] Press Win + R to open the Run window and type the command appwiz.cpl. Press Enter to open the window.
3] Find Skype among the list of applications. Right-click on it and click on uninstall to remove the Skype application from the system. Restart your system.
4] Now press Win + R to open the Run window again and type the command %appdata%. Press Enter to open the window.
5] Right-click on the Skype folder and then click on Delete.
6] Now go to C:\Program Files or C:\Program Files (x86) location and check if the Skype or SkypePM folder exist there. If yes, right-click and delete them.
7] Restart the system.
8] Install the Skype application again from Skype’s download website.
Hope it helps!


