Ideally, we need to close all programs before shutting down or restarting the system. However, in case we don’t, it would prompt while attempting to shut down the system. The options would be either to force close the system or close those programs first.
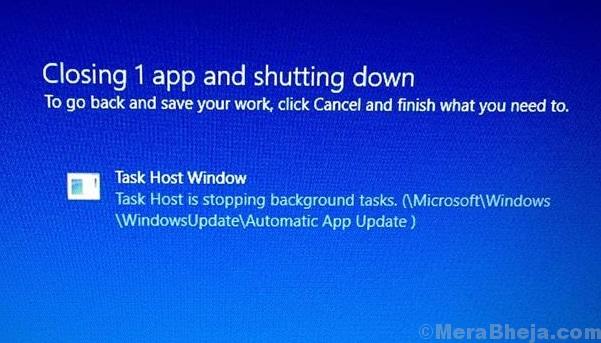
However, in case a Windows update is stuck (at times, not always), users get the following error:
Task Host Window, Task Host is stopping background tasks
Clicking on Shut down anyway won’t help in this case since the screen would remain stuck on that page. The only way to shut down the system would be to power it off.
Cause
The issue occurs when a troublesome update file prevents the system from both updating itself and shutting down.
Try the following solutions sequentially to resolve the problem:
Solution 1 – Changing wpnuserservice value in Registry
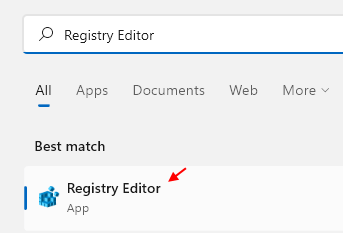
1 – Search Registry editor in Windows search box.
2 -Now, click on Registry editor to open it.

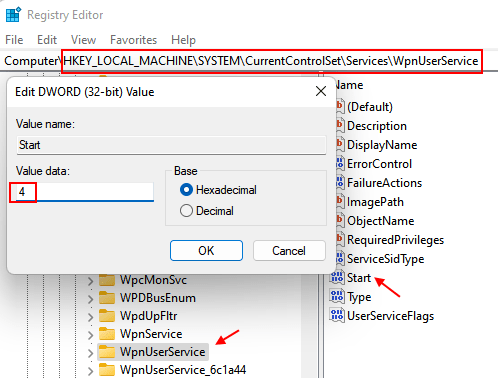
3 – Now, Once the registry editor opens up, go to the following path by copying and pasting the path in address bar of registry editor.
HKEY_LOCAL_MACHINE\SYSTEM\CurrentControlSet\Services\WpnUserService
4 – Now, in the right side locate an item named start.
5- Double click on start.
6- Change the value data to 4.

7 – Now, restart your computer.
Your problem will be solved.
Solution 2] Windows Update troubleshooter
Since the issue is with the Windows update, we could try the associate troubleshooter to fix the problem. If it helps, nothing else would be needed.
1] Click on the Start button and then the gear-like symbol to open the Settings page.
2] Go to Updates and security and then the Troubleshoot tab.
3] Find the Windows update troubleshooter and run it.
4] Once the process is done, restart the system.
Solution 2] Restart the Windows update service
1] Press Win + R to open the Run window. Type services.msc and press Enter to open the Windows service manager.

2] Locate the Windows update service in the list which is arranged in alphabetical order.
3] Right-click on the service and then click on Restart.

4] If it is stopped, right click on it and choose start.
Now, try again.
Solution 3] Turn OFF Fast startup
1] Press Win + R to open the Run window. Type the command powercfg.cpl and press Enter.

2] Find the option “Choose what the power button does” on the list on the left-hand side and click on it.
3] Click on “Change settings that are currently unavailable.”
4] Uncheck the option which says “Turn on fast startup” and then click on Save changes.

Solution 4] Reduce Shut down time
Note: Please backup your data before making any changes in the Registry editor.
1] Press Win + R to open the Run window. Type the command regedit and press Enter to open the Registry Editor.
2] Navigate to the following path:
- HKEY_LOCAL_MACHINE
- SYSTEM
- CurrentControlSet
- Control
3] On the right-pane, right-click on WaitToKillServiceTimeout and open its properties. Change the value of the entry to 5000.
4] Now navigate to the following key:
- HKEY_CURRENT_USER
- Control Panel
- Desktop
5] Again, change the value of WaitToKillServiceTimeout to 5000 for this key as well.
6] Restart the system.
Hope it helps!
