Microsoft Edge was quite an improvement to Internet Explorer. Most of the errors and issues on the browser were sorted out such that every error has a meaning. One such case is with the error:
Hmm, we can’t reach this page.
Upon getting this error, try the following preliminary steps:
Solution 1] Enable IPv6
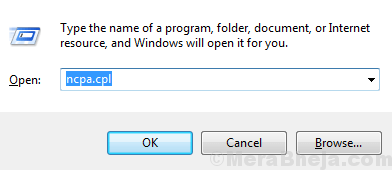
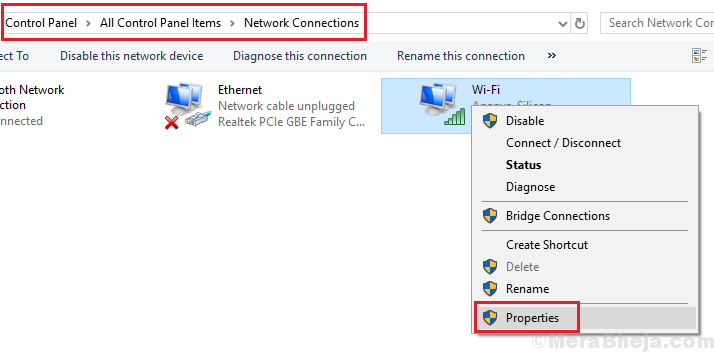
1] Press Win + R to open the Run window and type the command ncpa.cpl. Hit Enter to open the Network Connections window.
2] Right-click on your Network and select Properties.
3] Check the box next to Internet Protocol Version 6.
4] Select Apply and then OK to save the settings.
5] Restart the system.
Solution 2] Change Network profile to Public
1. Press Windows Key + R together to open run.
2. Copy and paste the location given below to open WiFi settings.
ms-settings:network-wifi

3. Click on your Connected WiFi Network

4. Now, Choose Private as your Network Option on Next page

Note: Alternatively if you are using Ethernet use ms-settings:network-ethernet in 2nd step and repeat the same process.
Solution 3] Clear the cache for Edge browser
1] Launch Microsoft Edge and click on the Hub icon.
2] Select History from the list on the left-hand side.
3] Click on Clear History.
4] Check the box next to Cached data and files.
5] Click on Clear to clear the cache.
6] Restart Microsoft Edge.
Solution 4] Check DNS Client Service status
1] Press Win + R to open the Run window and type the command services.msc. Press Enter to open the Service Manager window.
2] Locate the DNS client service in the list of services.
3] Verify that the status of the service should be running. If not, proceed as follows.
4] Right-click on the DNS client service and select Properties.
5] Change the Startup type to Automatic and click on Start.
Solution 4] Use Google’s public DNS
1] Open your Network’s properties window as explained in Solution 2.
2] Double-click on Internet Protocol Version 4 to open its properties.
3] Shift the radio button to Use the following DNS server addresses.
4] Enter the following values for the DNS addresses:
Preferred DNS address: 8.8.8.8
Alternate DNS address: 8.8.4.4
5] Click on Apply and then on OK to save the settings.
6] Restart the system.
Solution 5] Reset TCP/IP
1] Search for Command Prompt in the Windows search bar and type the following command:
netsh int ip reset resettcpip.txt
2] Press Enter to execute the command.
3] Restart the system and check if it fixes the issue.


