Many times we check the status of disk usage when we feel that computer is running slower than it should have and suddenly you find that there are some processes which seems useless but eating up your disk usage. There are a lot of Windows and 3rd party processes and programs on windows which use memory allocation in the background and makes it hard for the computer to run them all smoothly.
What is WSAPPX?
WSAPPX is one of those processes which often found to use most of the disk in the Windows computer. This process is part of the Windows Store program which handles installing, uninstalling and updates of the Windows Store apps.
So, mainly WSAPPX process is needed when we want to install, update or Uninstall any app from Windows Store. We have found some methods by which you can solve this high disk usage issue on the computer.
Method 1 – Disable Windows Store using Windows Registry
Windows Store is mostly useless in the Windows 10 and most users don’t even care to check apps on it. If you don’t download apps from the windows store and facing high disk usage issue due to WSAPPX you can disable Windows Store to stop this process.
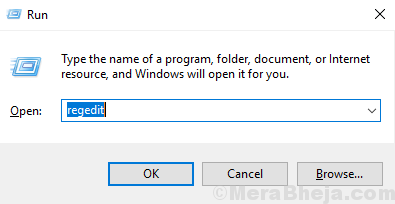
Step 1] Open Run box by pressing Windows and R at the same time, type regedit and hit enter.

Step 2] Click Yes on the user access control prompt. It will open Windows Registry Editor window.
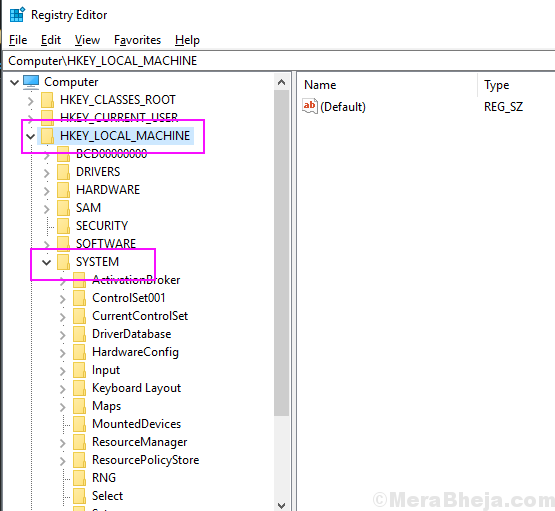
Step 3] On the Left Pane Expand HKEY_LOCAL_MACHINE and then SYSTEM (See below image for reference).

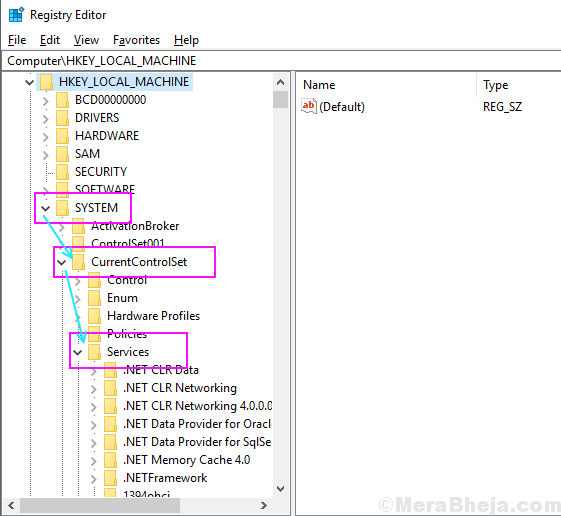
Step 4] In the SYSTEM folder, expand CurrentControlSet and then Services.

Step 5] In the Services folder scroll down, locate and select AppXSvc folder. You will find a number of keys in the AppXSvc folder.

Step 6] Double-click on the Start key, type 4 in the data value and click OK.

Close the Registry window and Now check the process is running in the Windows Task Manager or not.
Method 2 – Allocate more Virtual Memory
If you have often issues of high disk usage on your computer than it is advisable to increase the virtual memory allocation for the processes so that all the processes work smoothly and you also get disk memory for your work. To increase virtual memory allocation follow these steps.
Step 1] Press the Windows button and search for performance, click on the result that says Adjust the appearance and performance of windows. It will open performance options.

Step 2] Switch to the Advanced tab and click on the Change button under Virtual memory.

Step 3] Uncheck Automatically manage paging file size for all drives, select the OS drive and click on the custom size. In the Initial size, box type your RAM memory in MB and in Maximum size double of your RAM and then click Set.

Step 4] Click OK and reboot your device.
This process will increase your virtual memory and most probably you will never face high disk usage issues.
Method 3 – Use CHKDSK command to fix disk error if any
1. Open command prompt with administrative privilege. To do this just press windows key + r together to open run.
2. Now, write cmd in it and then press CTRL + SHIFT + Enter keys together from your keyboard. Press yes in the UAC prompt.

2. Now, run the command given below and hit enter key.
chkdsk.exe /f /r
Wait for some time for the command to get executed fully.