Here is how to disable Autocorrect or Spelling Check Feature in Windows 10. This disables Autocomplete feature even if you are using mail app. Many users complain that autocorrect is not getting turned OFF despite off different tweaks by the users. Here are few solutions to completely fix the issue.
Step 1 – Using settings
1. Click on start button.
2. Click on gear shaped icon to open settings.
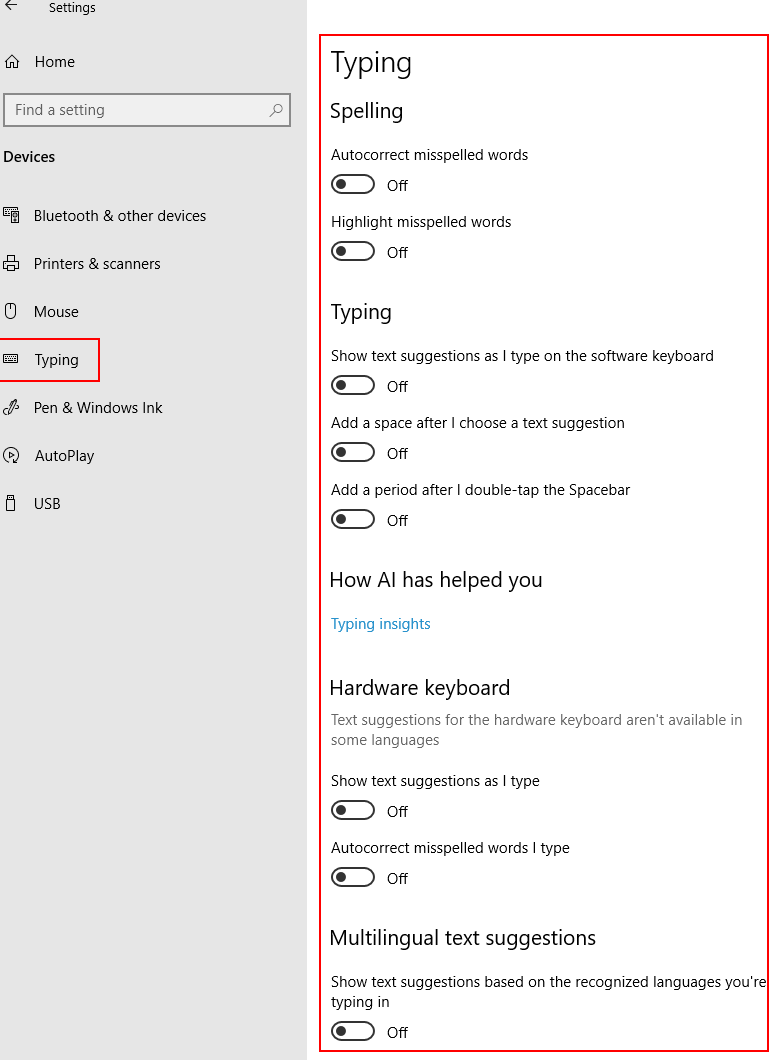
3. Click on Devices.
4. Click on Typing from the left panel.
5. Toggle off all the options on the right side.

Step 2 – Hide all proofing marks
1. Open mail app.
2. Now, click on new mail to start composing new mail.
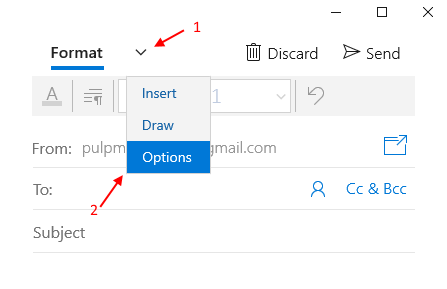
3. Now, click on downward arrow symbol located on the right of Format.
4. Now, click on Options.

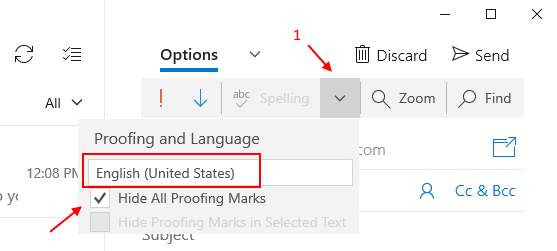
5. Now, click on downward arrow symbol located on the left of zoom.
6. From the menu that pops up, check option Hide all proofing marks.
7. Also choose , language in which you are writing this mail.

Solution 3 – Using gpedit.msc
1. Press Windows key + r together to open run.
2. Write gpedit.msc in it and click OK.
3. Now, go to the following path in left side of gpedit pane.
User Configuration -> Administrative Templates -> Control Panel -> Regional and Language Options
4. Now, click to enable both Turn off autocorrect misspelled words and Turn off highlight misspelled words
