windows 10 users are facing a strange problem. The Microsoft have not given any option to turn off auto updates in windows 10. In all the early versions of windows 10, this was an option. The problem with that is certain updates may mess up with some softwares and they stop working after it. Due to this, it may be a good idea to uninstall a specific windows 10 update to get back to the point where every thing seemed working fine for your PC.What if you wanted to roll back a particular windows update which just happened in past and is causing you trouble. Just follow the detailed steps with pictures below to uninstall a specific windows 10 update.
How to uninstall a specific update in windows 10
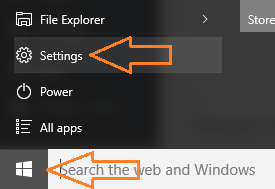
Step 1 – Press windows key + i to go to settings control panel of windows 10. You can also click on the window start icon and click on settings.
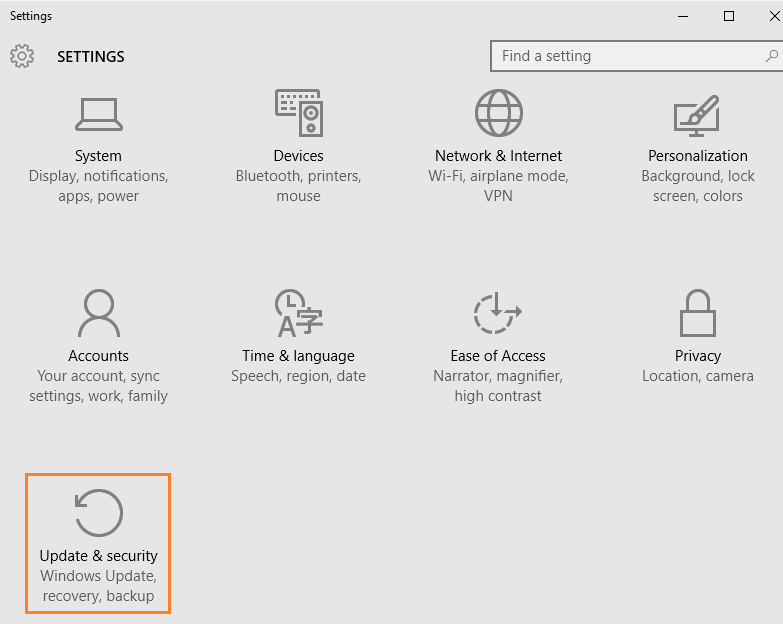
Step 2 – Once you reach the setting control panel. just click on update & security in the menu.

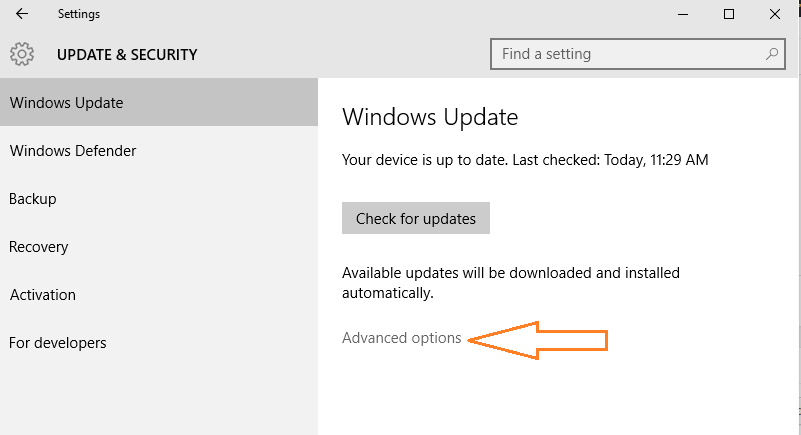
Step 2 – Now in the next screen, in the right side click on the link in the light gray which says Advanced options.

Step 3 – Next click on view update history as shown in the screenshot below

Step 4 – Now click on uninstall updates located at the top as shown in the picture below.

Step 5 -Now select an update of windows 10 from the list and double click on it. Confirm the uninstall. The selected update will get uninstalled.

You are done. You have uninstalled the specific windows 10 update.
Now, since windows 10 has auto update feature enabled, you must go and turn off the windows 10 auto update after this step.
Tip:- Confused which window 10 update to uninstall. Just look at the screen described in step 4. Find the updates based on the date on which it was installed.
