Repair And Rebuild A Broken Icon Cache In Windows 10:- So you install this new update of your favourite game and that’s when you notice that the icon of the game remains the same. The new update offers a brand new icon and you are just missing something out on that front. Not so cool, as far as a tech enthusiast is considered. Of course, digging deep, finding the cause and walking past the problem maker is not new to you, that’s why you are here, aren’t you? Well, I can quickly tell you the secret behind this issue. In most of the cases, it’s the icon cache that is behind the curtains. So, read on, to learn how to tackle this issue on your own with a very few number of steps.
How to delete Icon Cache files
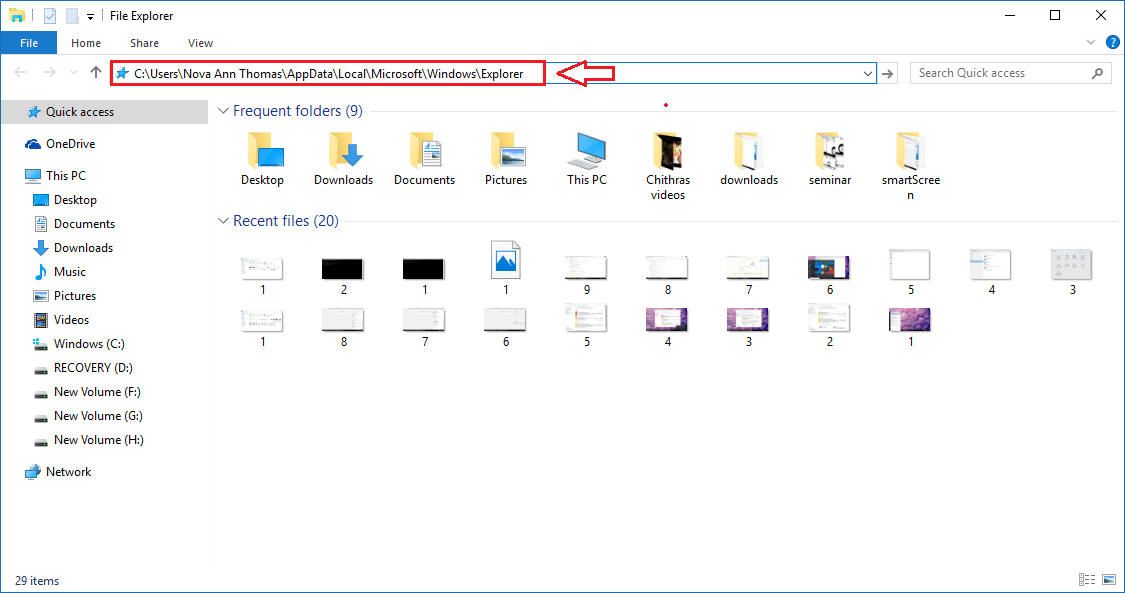
STEP 1 – To repair the broken icon cache, first of all, you need to navigate to the following path. If you find the navigation part a bit too hard, you can simply copy-paste the path into your file explorer navigation bar and hit Enter as shown in the screenshot.
C:\Users\%username%\AppData\Local\Microsoft\Windows\Explorer
STEP 2 – Once you are in the Explorer folder, you will be able to see a number of icon cache files. In order to repair a broken icon cache, you need to get all these files deleted. Press CTRL+A and hit Delete key for all Iconcache files.
Step 3 – Just restart your PC and all files will be recreated.
Alternative method using command prompt
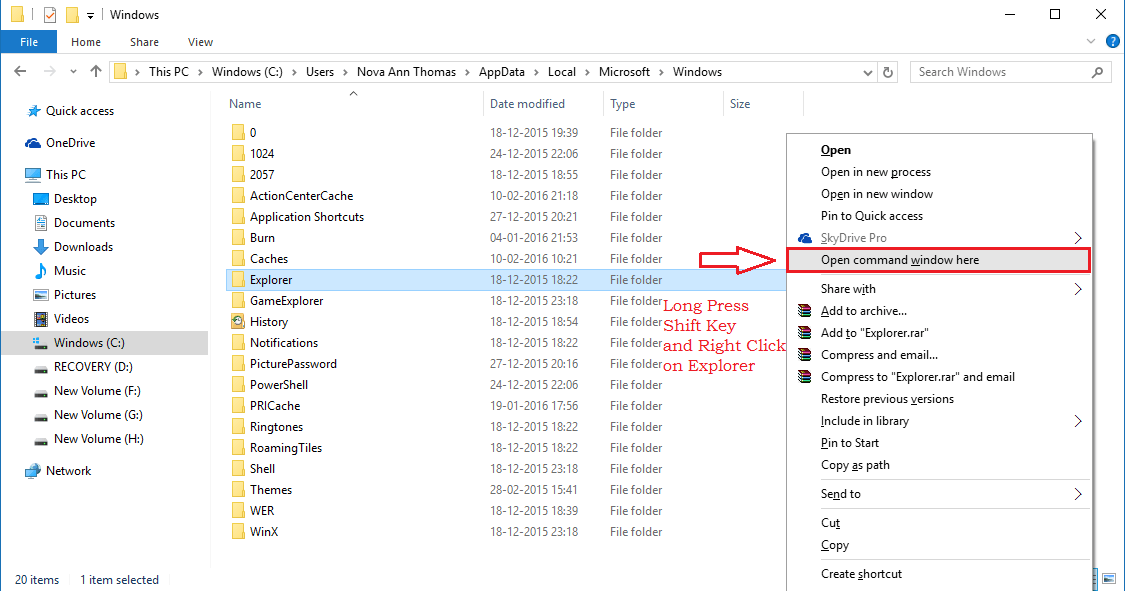
STEP 1 – Simply navigate to the following path or copy-paste the given path in your file explorer navigation bar. Once you are done, hit Enter. In the Windows folder, look for a sub-folder named Explorer. Once you are done with finding it, long press on the Shift key on your keyboard and right-click on the Explorer folder. From the context menu, click on the option that says Open command window here.
C:\Users\%username%\AppData\Local\Microsoft\Windows
STEP 2 – Successful execution of the previous step will open a command window at the path you have selected. Just to be sure, type in dir into your command prompt and hit enter. This will list all the icon cache files that you saw in the second step.
STEP 3 – As next, you need to open the Task Manager. For that, simply right-click on an empty space in the Task bar and click on the option that says Task Manager.
STEP 4 – Look for Windows Explorer in the list of Processes. Right click on it and then select End task. This will cause the disappearance of the Explorer and the Desktop. Don’t panic. It’s all under control. Now exit from the Task Manager and make sure that no other application but the Command Prompt is running.
STEP 7 – To delete all the icon cache files, type in the following command in the Command Prompt. Don’t forget to hit Enter.
del iconcache*
The star (*) at the end of iconcache ensures that all the files starting with iconcache get deleted.
STEP 5 – Now use the dir command once again to view the files under the folder. If there are any more files visible, it means that some applications are still running in the background. Close all of them and repeat the del iconcache* command once again.
As the final step, press CTRL+ALT+DEL keys together and choose Sign Off option. Once you sign back in, all the broken cache files will be repaired or replaced.
That’s it. Nothing gives more pleasure that solving an issue of ours on our own, isn’t it? Come back for more, as there is always something new waiting.


