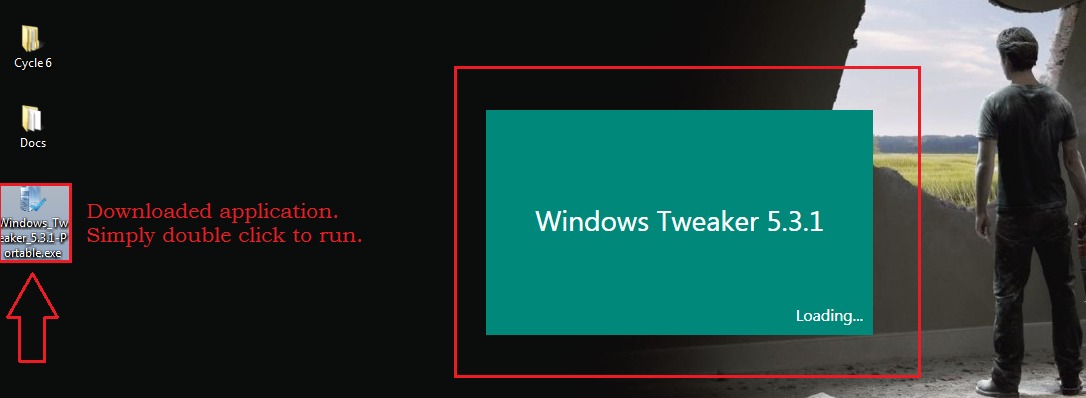
Windows Tweaker is a powerful free tweaking utility that provides users with the ultimate user experience. Windows Tweaker lets you customize your Windows in any way you want, without the help of any additional software. It works on almost all versions of Windows as it is a portable utility. You can download Windows Tweaker from here. Once Windows Tweaker is downloaded, simply double-click on it to launch it.
Windows Tweaker is amazing in many a number of ways. It has got a wide variety of features which lets its users experiment with different parts of Windows. Also, the user interface(UI) is extremely simple to navigate and easy to understand. Read on, to learn all about this super cool free tweaking utility.
STEP 1
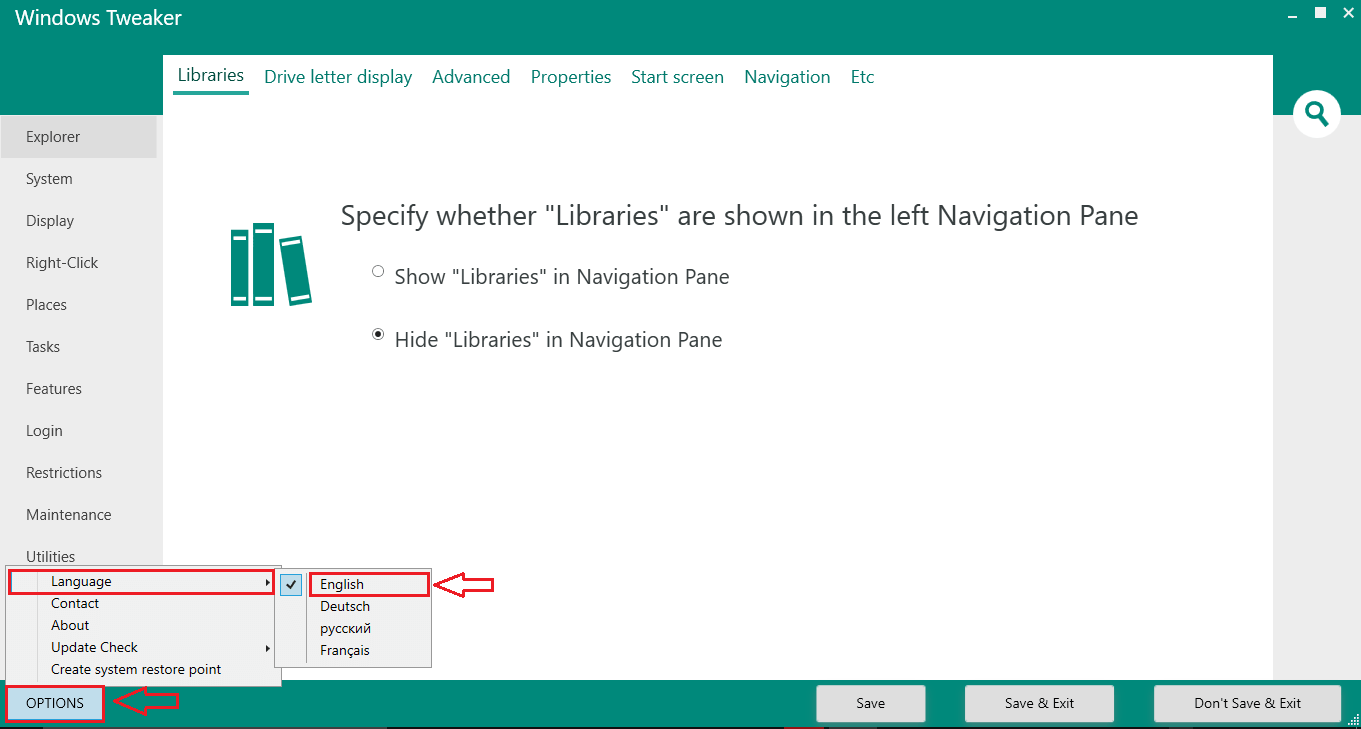
- First of all, launch Windows Tweaker. Let’s start by setting the language. You can click on the OPTIONS button at the bottom and then on Languaue option to select the language of your choice.
STEP 2
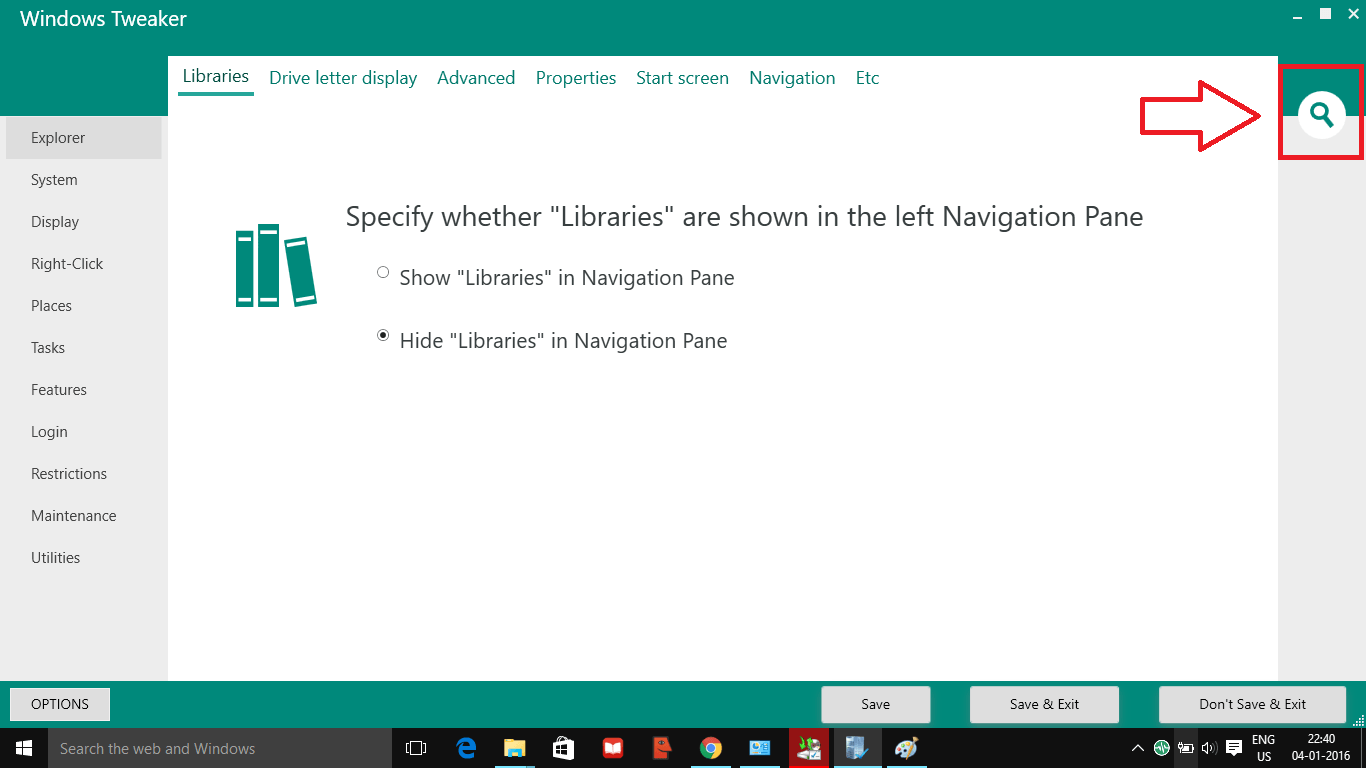
- If you do not have the time or the patience to go through every single option to find the one that you are looking for, simply click on the Search icon located at the right part of the window.
STEP 3
- In the search bar that gets expanded out, type in the keyword as shown in the screenshot. Now from the list of options that appears, you can select the one of your choice.
STEP 4
- If you have had a look at your File Explorer navigation pane, you might have noticed that a lot of folders are shown there. One of them is Libraries. You can choose whether to take it off from there or not. For that, click on Explorer option from the list of options that are there in the left pane of the Windows Tweaker window. Now, select the tab which says Libraries. Check/uncheck the radio button as per your preference.
STEP 5
- When you are in a run, you definitely wouldn’t want your system shutdown to take a lot of time. If you click on the System option from the left pane, you can set the shutdown configuration preferences as shown in the screenshot.
STEP 6
- Display settings can be modified if you click on the Display option from the left window pane of Windows Tweaker.
STEP 7
- Click on Right Click option from the left window pane of Windows Tweaker. Here you get to customize a lot of right click features as shown in the screenshot under the General tab. Also, under the Send-to menu tab, you can edit the send-to menu.
STEP 8
- Click on Login option to play around with the login features. You can enable Automatic Login under the Automatic login tab. You can also decide whether or not to play a sound while Windows starts up under the Startup sound tab.
STEP 9
- Next is Tasks option. You can hide/unhide a file/folder from here.
STEP 10
- Click on Create file tab to create a file of very large size.
STEP 11
- You can pre-schedule a system shut down under the Schedule shutdown tab in the Tasks option.
STEP 12
- As next, click on Restrictions options. If you choose the tab Start menu, you will be able to change the start menu features as shown.
STEP 13
- Of course, do not forget to hit the Save and Exit button before you leave. The changes you have made will take over with the next system restart.
These are only some of the many features offered by Windows Tweaker utility. There are a lot more to explore and feel free to do so. But remember not to clutter it because if you do not like a change that has been made, it will be difficult to revert back if you do not know what caused the change. So make changes one at a time just as a precaution. Hope you had fun reading the article.


