Are you using internet on your PC and want create a wifi hotspot on windows 7 or 8 Computer so that you can use the internet on your mobile phone or nearby computer also. Here is the guide in simple steps to do that. No, rocket science is required, Just follow steps below.
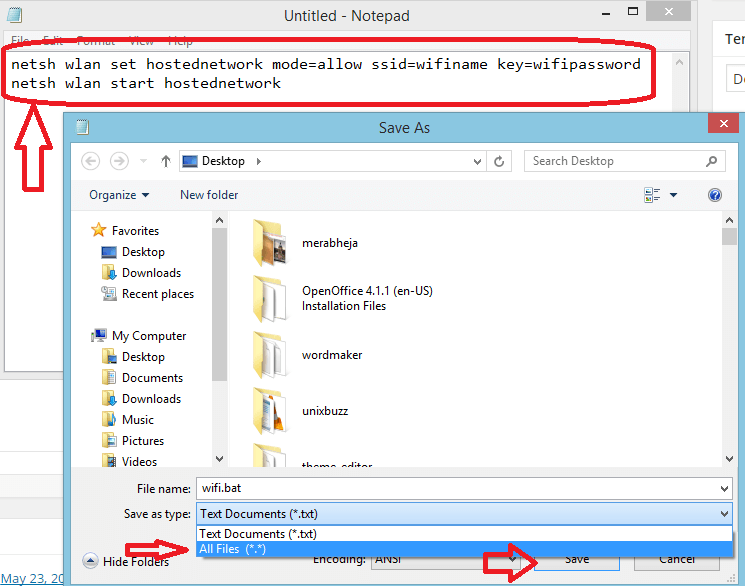
First of all copy these two lines below and paste it in any notepad.
How to Create a wifi Hotspot on Windows 7/8/10 PC
netsh wlan set hostednetwork mode=allow ssid=wifiname key=wifipassword

netsh wlan start hostednetwork
Imporant – You can rename wifiname and wifipassword in red as your wish.
The ssd will be the wifi name with which it will be visible to nearby phones or computers. The wifi password will be the required password for the device to get connected to your PC.
Now Save it as wifi.bat on your desktop or in any folder. This will act as a quick launch button for starting wifi hotspot.

Now click on that icon wifi bat on tour computer.

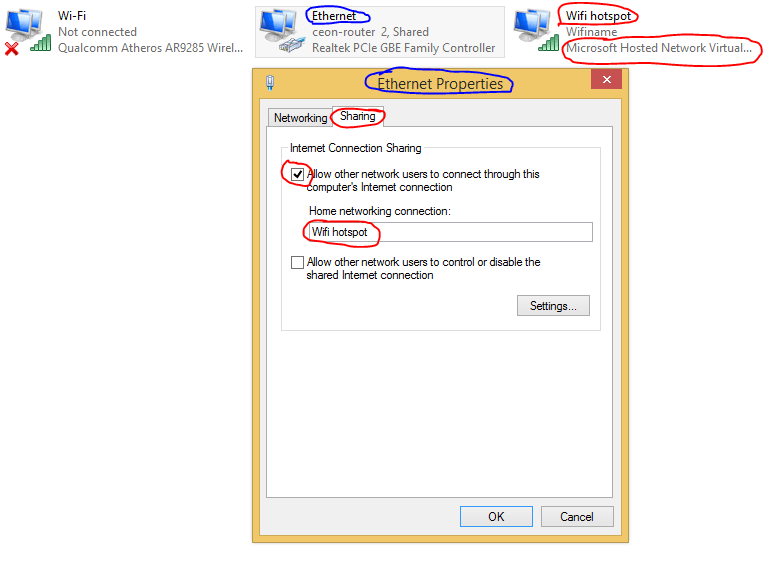
Final Step : – Now Go to Network and Sharing Centre and Change Adapter Settings of your ethernet.

Cheers! As you have Just created a wifi Hotspot on your computer.
If you want to stop it just Go to Network and Sharing Centre and disable it.
Alternatively you can create a batch file named . Stop-wifi.bat with the content given below.
netsh wlan stop hostednetwork
When you will click on this bat file the wifi hot spot will be stopped.
Now go to your phone and search for available wifi network and connect it. So, here was it all which should be done to create a wifi hotspot on your windows PC easily.